Quad Input, Five-Output, Dual DPLL
Synchronizer and Adaptive Clock Translator
AD9542
Data Sheet
FEATURES
APPLICATIONS
Dual DPLL synchronizes 2 kHz to 750 MHz physical layer
clocks providing frequency translation with jitter cleaning
of noisy references
Complies with ITU-T G.8262 and Telcordia GR-253
Supports Telcordia GR-1244, ITU-T G.812, G.813, G.823,
G.824, and G.825
Continuous frequency monitoring and reference validation
for frequency deviation as low as 50 ppb
Both DPLLs feature a 24-bit fractional divider with 24-bit
programmable modulus
Programmable digital loop filter bandwidth: 10−4 Hz to 1850 Hz
Automatic and manual holdover and reference switchover,
providing zero delay, hitless, or phase buildout operation
Programmable priority-based reference switching with
manual, automatic revertive, and automatic nonrevertive
modes supported
5 pairs of clock output pins with each pair useable as
differential LVDS/HCSL/CML or as 2 single-ended outputs
(1 Hz to 500 MHz)
2 differential or 4 single-ended input references
Crosspoint mux interconnects reference inputs to PLLs
Supports embedded (modulated) input/output clock signals
Fast DPLL locking modes
Provides internal capability to combine the low phase noise
of a crystal resonator or crystal oscillator with the
frequency stability and accuracy of a TCXO or OCXO
External EEPROM support for autonomous initialization
Single 1.8 V power supply operation with internal regulation
Built in temperature monitor/alarm and temperature
compensation for enhanced zero delay performance
SyncE jitter cleanup and synchronization
Optical transport networks (OTN), SDH, and macro and small
cell base stations
OTN mapping/demapping with jitter cleaning
Small base station clocking, including baseband and radio
Stratum 2, Stratum 3e, and Stratum 3 holdover, jitter
cleanup, and phase transient control
JESD204B support for analog-to-digital converter (ADC) and
digital-to-analog converter (DAC) clocking
Cable infrastructures
Carrier Ethernet
Rev. 0
GENERAL DESCRIPTION
The 10 clock outputs of the AD9542 are synchronized to any
one of up to four input references. The digital phase-locked
loops (DPLLs) reduce timing jitter associated with the external
references. The digitally controlled loop and holdover circuitry
continuously generate a low jitter output signal, even when all
reference inputs fail.
The AD9542 is available in a 48-lead LFCSP (7 mm × 7 mm)
package and operates over the −40°C to +85°C temperature
range.
Note that throughout this data sheet, multifunction pins, such
as SDO/M5, are referred to either by the entire pin name or by a
single function of the pin, for example, M5, when only that
function is relevant.
Document Feedback
Information furnished by Analog Devices is believed to be accurate and reliable. However, no
responsibility is assumed by Analog Devices for its use, nor for any infringements of patents or other
rights of third parties that may result from its use. Specifications subject to change without notice. No
license is granted by implication or otherwise under any patent or patent rights of Analog Devices.
Trademarks and registered trademarks are the property of their respective owners.
One Technology Way, P.O. Box 9106, Norwood, MA 02062-9106, U.S.A.
Tel: 781.329.4700
©2017 Analog Devices, Inc. All rights reserved.
Technical Support
www.analog.com
�AD9542
Data Sheet
TABLE OF CONTENTS
Features .............................................................................................. 1
System Clock PLL ........................................................................... 29
Applications ....................................................................................... 1
System Clock Input Frequency Declaration ........................... 29
General Description ......................................................................... 1
System Clock Source .................................................................. 29
Revision History ............................................................................... 3
2× Frequency Multiplier ............................................................ 29
Functional Block Diagram .............................................................. 4
Prescale Divider .......................................................................... 29
Specifications..................................................................................... 5
Feedback Divider........................................................................ 30
Supply Voltage ............................................................................... 5
System Clock PLL Output Frequency ..................................... 30
Supply Current .............................................................................. 5
System Clock PLL Lock Detector............................................. 30
Power Dissipation ......................................................................... 5
System Clock Stability Timer.................................................... 30
System Clock Inputs, XOA and XOB......................................... 6
System Clock Input Termination Recommendations ........... 30
Reference Inputs ........................................................................... 7
Digital PLL (DPLL) ........................................................................ 31
Reference Monitors ...................................................................... 8
Overview ..................................................................................... 31
DPLL Phase Characteristics ........................................................ 8
DPLL Phase/Frequency Lock Detectors ................................. 31
Distribution Clock Outputs ........................................................ 9
DPLL Loop Controller............................................................... 31
Time Duration of Digital Functions ........................................ 10
Applications Information .............................................................. 32
Digital PLL (DPLL0, DPLL1) Specifications .......................... 10
Optical Networking Line Card ................................................. 32
Digital PLL Lock Detection Specifications ............................. 11
Small Cell Base Station .............................................................. 33
Holdover Specifications ............................................................. 11
Initialization Sequence................................................................... 34
Analog PLL (APLL0, APLL1) Specifications .......................... 11
Status and Control Pins ................................................................. 37
Output Channel Divider Specifications .................................. 11
Multifunction Pins at Reset/Power-Up ................................... 37
System Clock Compensation Specifications ........................... 12
Status Functionality.................................................................... 38
Temperature Sensor Specifications .......................................... 12
Control Functionality ................................................................ 38
Serial Port Specifications ........................................................... 12
Interrupt Request (IRQ) ................................................................ 43
Logic Input Specifications (RESETB, M0 to M6) .................. 14
IRQ Monitor ............................................................................... 43
Logic Output Specifications (M0 to M6) ................................ 14
IRQ Mask..................................................................................... 43
Jitter Generation (Random Jitter) ............................................ 14
IRQ Clear..................................................................................... 43
Phase Noise ................................................................................. 15
Watchdog Timer ............................................................................. 45
Absolute Maximum Ratings .......................................................... 18
Lock Detectors ................................................................................ 46
Thermal Resistance .................................................................... 18
DPLL Lock Detectors ................................................................ 46
ESD Caution ................................................................................ 18
Phase Step Detector........................................................................ 48
Pin Configuration and Function Descriptions ........................... 19
Phase Step Limit ......................................................................... 48
Typical Performance Characteristics ........................................... 21
Skew Adjustment ........................................................................ 49
Terminology .................................................................................... 25
EEPROM Usage .............................................................................. 50
Theory of Operation ...................................................................... 26
Overview ..................................................................................... 50
Overview...................................................................................... 26
EEPROM Controller General Operation ................................ 50
Reference Input Physical Connections .................................... 26
EEPROM Instruction Set .......................................................... 51
Input/Output Termination Recommendations .......................... 27
Multidevice Support................................................................... 53
System Clock Inputs ................................................................... 27
Serial Control Port ......................................................................... 55
Reference Clock Inputs .............................................................. 27
SPI/I²C Port Selection................................................................ 55
Clock Outputs ............................................................................. 28
SPI Serial Port Operation .......................................................... 55
Rev. 0 | Page 2 of 61
�Data Sheet
AD9542
I2C Serial Port Operation ...........................................................58
Ordering Guide ........................................................................... 61
Outline Dimensions ........................................................................61
REVISION HISTORY
9/2017—Revision 0: Initial Version
Rev. 0 | Page 3 of 61
�AD9542
Data Sheet
FUNCTIONAL BLOCK DIAGRAM
REFA
REFAA
REFB
REFBB
AD9542
REF
DEMOD
÷RA
REF
DEMOD
÷RAA
REF
DEMOD
÷RB
TDC
REF
DEMOD
÷RBB
TDC
REFERENCE
SWITCHING
TDC
TDC
REFERENCE
MONITORS
DPLL0
DIGITAL
CROSSPOINT
MUX
DPLL1
APLL0
2.424GHz
TO
3.232GHz
÷Q0A
OUT0AP
÷Q0AA
OUT0AN
÷Q0B
OUT0BP
÷Q0BB
OUT0BN
3.232GHz
TO
4.04GHz
÷Q0C
OUT0CP
APLL1
÷Q0CC
OUT0CN
INTERNAL
ZERO DELAY
AUXILIARY
NCOs
AUXILIARY
TDCs
TEMPERATURE
SENSOR
Mx PINS
EXTERNAL
EEPROM
(OPTIONAL)
STATUS AND
CONTROL PINS
SERIAL PORT
(SPI OR I2C)
CONTROLLER
SYSTEM
CLOCK PLL
SERIAL PORT
(OPTIONAL EXTERNAL EEPROM)
XOA
XOB
Figure 1.
Rev. 0 | Page 4 of 61
SYSTEM
CLOCK
÷Q1A
OUT1AP
÷Q1AA
OUT1AN
÷Q1B
OUT1BP
÷Q1BB
OUT1BN
MODULATION, PHASE
OFFSET, AND JESD204B
15826-001
SYSTEM CLOCK
COMPENSATION
�Data Sheet
AD9542
SPECIFICATIONS
The minimum and maximum values apply for the full range of supply voltage and operating temperature variations. The typical values
apply for VDD = 1.8 V and TA= 25°C, unless otherwise noted.
SUPPLY VOLTAGE
Table 1.
Parameter
SUPPLY VOLTAGE
VDDIOA, VDDIOB
VDD
Min
Typ
Max
Unit
Test Conditions/Comments
1.71
1.71
1.8
1.8
3.465
1.89
V
V
1.8 V, 2.5 V, and 3.3 V operation supported
SUPPLY CURRENT
The maximum supply voltage values given in Table 1 are the basis for the maximum supply current specifications. The typical supply
voltage values given in Table 1 are the basis for the typical supply current specifications. The minimum supply voltage values given in
Table 1 are the basis for the minimum supply current specifications.
Table 2.
Parameter
SUPPLY CURRENT FOR TYPICAL
CONFIGURATION
IVDDIOx
IVDD
SUPPLY CURRENT FOR ALL BLOCKS
RUNNING CONFIGURATION
IVDDIOx
IVDD
Min
Typ
Max
Unit
260
5
310
8
355
mA
mA
321
5
390
8
430
mA
mA
Test Conditions/Comments
The Typical Configuration specification in Table 3 is the basis for
the values shown in this section
Aggregate current for all VDDIOx pins (where x = A or B)
Aggregate current for all VDD pins
The All Blocks Running condition in Table 3 is the basis for the
values shown in this section
Aggregate current for all VDDIOx pins (where x = A or B)
Aggregate current for all VDD pins
POWER DISSIPATION
The typical values apply for VDD = 1.8 V, and the maximum values apply for VDD = 1.89 V.
Table 3.
Parameter
POWER DISSIPATION
Typical Configuration
445
All Blocks Running
548
Full Power-Down
Min
Typ
Max
Unit
Test Conditions/Comments
560
671
mW
700
813
mW
System clock = 49.152 MHz crystal; two DPLLs active;
two 19.44 MHz input references in differential mode;
two ac-coupled PLL0 CML output drivers at 245.76 MHz;
and 2 PLL1 CML output drivers at 156.25 MHz
System clock = 49.152 MHz crystal; two DPLLs active;
two 19.44 MHz input references in differential mode;
3 ac-coupled PLL0 HCSL output drivers at 400 MHz; and
two PLL1 HCSL output drivers at 400 MHz
Based on the Typical Configuration specification with the
power down all bit set to Logic 1
Based on the Typical Configuration specification; the values in this
section indicate the change in power due to the indicated
operation relative to the Typical Configuration specification
Change in dissipated power relative to the Typical Configuration
specification; the blocks, powered down, consist of 1 reference
input, 1 DPLL, 1 APLL, 2 channel dividers, and 2 output drivers
125
mW
Complete DPLL/APLL On/Off
200
mW
Incremental Power Dissipation
Complete DPLL/APLL On/Off
200
mW
Incremental Power Dissipation
Based on the Typical Configuration specification; the values in
this section indicate the change in power due to the indicated
operation relative to the Typical Configuration specification;
the blocks, powered down, consist of one reference input, one
DPLL, one APLL, two channel dividers, and two output drivers
Rev. 0 | Page 5 of 61
�AD9542
Parameter
Input Reference On/Off
Differential (Normal Mode)
Differential (DC-Coupled LVDS)
Single-Ended
Output Distribution Driver On/Off
15 mA Mode
12 mA Mode
7.5 mA Mode
Auxiliary DPLL On/Off
Data Sheet
Min
Typ
Max
Unit
Test Conditions/Comments
20
21
13
mW
mW
mW
fREF = 19.44 MHz
fREF = 19.44 MHz
fREF = 19.44 MHz
At 156.25 MHz
30
23
15
1
mW
mW
mW
mW
SYSTEM CLOCK INPUTS, XOA AND XOB
Table 4.
Parameter
SYSTEM CLOCK MULTIPLIER
Output Frequency Range
Min
Max
Unit
Test Conditions/Comments
2250
2415
MHz
The frequency range of the internal voltage controlled
oscillator (VCO) places limits on the choice of the system
clock input frequency
Phase Frequency Detector (PFD) Rate
SYSTEM CLOCK REFERENCE INPUT PATH
Input Frequency Range
System Clock Input Doubler
Disabled
20
300
MHz
Enabled
Self Biased Common-Mode Voltage
Input Voltage
High
Low
Differential Input Voltage Sensitivity
16
Slew Rate for Sinusoidal Input
System Clock Input Divider
(J Divider) Frequency
System Clock Input Doubler
Duty Cycle
20 MHz to 150 MHz
16 MHz to 20 MHz
Input Resistance
QUARTZ CRYSTAL RESONATOR PATH
Resonator Frequency Range
Crystal Motional Resistance
Typ
System clock input must be ac-coupled
20
300
MHz
150
MHz
V
0.75
0.9
250
V
V
mV p-p
50
V/µs
100
MHz
0.5
Support of oven controlled crystal oscillators (OCXOs) <
20 MHz is possible using the auxiliary DPLL for system clock
frequency compensation
Internally generated
For dc-coupled, single-ended operation
For dc-coupled, single-ended operation
Minimum voltage swing required (as measured with a
differential probe) across the XOA/XOB pins to ensure
switching between logic states; the instantaneous voltage on
either pin must not exceed 1.2 V; accommodate the singleended input by ac grounding the complementary input;
800 mV p-p recommended for optimal jitter performance
Minimum input slew rate for device operation; oscillators
with square wave outputs are recommended if not using a
crystal
Tolerable duty cycle variation on the system clock input
when using the frequency doubler
43
47
25
50
50
5
57
53
%
%
kΩ
60
100
MHz
Ω
Rev. 0 | Page 6 of 61
Fundamental mode, AT cut crystal
A maximum motional resistance of 50 Ω , and maximum
CLOAD of 8 pF is strongly recommended for crystals >52 MHz
�Data Sheet
AD9542
REFERENCE INPUTS
Table 5.
Parameter
DIFFERENTIAL MODE
Min
Frequency Range
Sinusoidal Input
LVPECL Input
LVDS Input
2000
2000
Slew Rate for Sinusoidal input
20
Common-Mode Input Voltage
Differential Input Amplitude
fIN < 500 MHz
fIN = 500 MHz to 750 MHz
Differential Input Voltage Hysteresis
Input Resistance
Input Pulse Width
LVPECL
LVDS
DC-COUPLED, LVDS-COMPATIBLE
MODE
Frequency Range
Common-Mode Input Voltage
Differential Input Amplitude
Differential Input Voltage Hysteresis
Input Resistance
Input Pulse Width
SINGLE-ENDED MODE
Frequency Range
1.2 V AC-Coupled
1.2 V and 1.8 V CMOS
1.2 V AC-Coupled Common-Mode
Voltage
Input Amplitude (Single-Ended,
AC-Coupled Mode)
1.2 V and 1.8 V CMOS Input
Voltage
High, VIH
Low, VIL
Input Resistance
DC-Coupled Single-Ended
Mode
AC-Coupled Single-Ended
Mode
Input Pulse Width
Typ
Max
Unit
Test Conditions/Comments
Differential mode specifications assume ac coupling
of the input signal to the reference input pins
750
750 × 106
500 × 106
MHz
Hz
Hz
Lower limit dependent on input slew rate
Lower limit dependent on ac coupling
Assumes an LVDS minimum of 494 mV p-p differential
amplitude; lower limit dependent on ac coupling
Minimum input slew rate for device operation; jitter
degradation may occur for slew rates < 35 V/µs
Internally generated self bias voltage
Peak-to-peak differential voltage swing across pins
required to ensure switching between logic levels as
measured with a differential probe; instantaneous
voltage on either pin must not exceed 1.3 V
V/µs
0.64
350
500
55
16
V
2100
2100
100
600
900
mV p-p
mV p-p
mV
kΩ
Equivalent differential input resistance
ps
ps
Applies for dc-coupling to an LVDS source
2000
1.125
400
55
16
450 × 106
1.375
1200
Hz
V
mV p-p
100
mV
kΩ
ns
1
Differential voltage across pins required to ensure
switching between logic levels; instantaneous
voltage on either pin must not exceed the supply rails
Single-ended mode specifications assume dc
coupling of the input signal to the reference input
pins
500 × 106
500 × 106
2000
2000
610
Hz
Hz
mV
Lower limit dependent on ac-coupling
CMOS specifications assume dc coupling of the input
signal to the reference input pins
Internally generated self-bias voltage
360
1200
mV p-p
Peak-to-peak single-ended voltage swing;
instantaneous voltage must not exceed 1.3 V
0.65 ×
VREF
1.15 × VREF
V
VREF is determined by operating mode of the CMOS
input receiver, 1.2 V or 1.8 V
0.35 × VREF
V
900
30
kΩ
15
kΩ
ps
Rev. 0 | Page 7 of 61
�AD9542
Data Sheet
REFERENCE MONITORS
Table 6.
Parameter
REFERENCE MONITORS
Reference Monitor
Loss of Reference
Detection Time
Frequency Out of
Range Limits
Validation Timer
Excess Jitter Alarm Threshold
Min
Typ
Max
4.9 + 0.13 × tPFD
Unit
Test Conditions/Comments
µs
tPFD is the nominal phase detector period, R/fREF, where R is
the frequency division factor determined by the R divider,
and fREF is the frequency of the active reference
Parts per billion (ppb) is defined as Δf/fREF, where Δf is the
frequency deviation, and fREF is the reference input
frequency; programmable with the lower bound, subject
to quality of the system clock (or the source of system
clock compensation)
Programmable in 1 ms increments
Programmable in 1 ns increments
5 × 10⁻⁸
0.015
ppb
0.001
1
1048
65535
sec
ns
DPLL PHASE CHARACTERISTICS
Table 7.
Parameter
MAXIMUM OUTPUT PHASE
PERTURBATION
Min
Typ
Max
Unit
±20
±140
ps
±18
0
±125
ps
ps
Phase Refinement Disabled
Peak
Steady State
Phase Buildout Operation
Hitless Operation
Phase Refinement Enabled
Peak
Steady State
Phase Buildout Operation
Hitless Operation
PHASE SLEW LIMITER
Test Conditions/Comments
Assumes a jitter free reference; satisfies Telcordia GR-1244-CORE
requirements; 0 ppm frequency difference between references;
reference switch initiated via register map (see the AD9542 Register
Map Reference Manual) by faulting the active reference input
50 Hz DPLL loop bandwidth; normal phase margin mode; frequency
translation = 19.44 MHz to 155.52 MHz; 49.152 MHz signal generator
used for system clock source
50 Hz DPLL loop bandwidth; high phase margin mode; phase
refinement iterations = 4; frequency translation = 19.44 MHz to
155.52 MHz; 49.152 MHz signal generator used for system clock source
0.001
±5
±40
ps
±4
0
±35
ps
ps
µs/sec
250
See the AN-1420 Application Note, Phase Buildout and Hitless
Switchover with Digital Phase-Locked Loops (DPLLs)
Rev. 0 | Page 8 of 61
�Data Sheet
AD9542
DISTRIBUTION CLOCK OUTPUTS
Table 8.
Parameter
DIFFERENTIAL MODE
Output Frequency
CML
HCSL
Differential Output Voltage Swing
Output Current = 7.5 mA
HCSL
CML
Output Current = 15 mA
HCSL
CML
Common-Mode Output Voltage
Output Current = 7.5 mA
HCSL
CML
Output Current = 15 mA
HCSL
CML
SINGLE-ENDED MODE
Output Frequency
Output Current = 12 mA
Voltage Swing (Peak-to-Peak)
HCSL Driver Mode
CML Driver Mode
Voltage Swing Midpoint
HCSL Driver Mode
CML Driver Mode
Output Current = 15 mA
Voltage Swing (Peak-to-Peak)
HCSL Driver Mode
CML Driver Mode
Voltage Swing Midpoint
HCSL Driver Mode
CML Driver Mode
Min
Typ
1
1
Max
Unit
500 × 106
500 × 106
Hz
Hz
Test Conditions/Comments
All testing is both ac-coupled and dc-coupled
Frequency range determined by driver
functionality; actual frequency synthesis may be
limited by the APLL VCO frequency range
Terminated per Figure 33
Terminated per Figure 32
Voltage between output pins measured with
output driver static; peak-to-peak differential
output amplitude is twice that shown when driver
is toggling and measured using a differential probe
312
257
368
348
402
408
mV
mV
Terminated per Figure 32
Terminated to VDD (nominal 1.8 V) per Figure 33
631
578
745
729
809
818
mV
mV
Terminated per Figure 32
Terminated to VDD (nominal 1.8 V) per Figure 33
155
VDD − 208
184
VDD − 188
201
VDD − 169
mV
mV
Terminated per Figure 32
Terminated to VDD (nominal 1.8 V) per Figure 33
(maximum common-mode voltage case occurs at
the minimum amplitude)
316
VDD − 416
372
VDD − 371
405
VDD − 327
mV
mV
Terminated per Figure 32
Terminated to VDD (nominal 1.8 V) per Figure 33
(maximum common-mode voltage case occurs at
the minimum amplitude)
500 × 106
Hz
Frequency range determined by driver
functionality; actual frequency synthesis may be
limited by the APLL VCO frequency range
1
509
456
584
565
634
644
mV
mV
Each output terminated per Figure 37 with RL = 50 Ω
Each output terminated per Figure 37 with RL = 50 Ω
connected to VDD (nominal 1.8 V) instead of GND
255
VDD − 325
292
VDD − 291
317
VDD − 266
mV
mV
Each output terminated per Figure 37 with RL = 50 Ω
Each output terminated per Figure 37 with RL = 50 Ω
connected to VDD (nominal 1.8 V) instead of GND
645
589
734
721
796
815
mV
mV
Each output terminated per Figure 37 with RL = 50 Ω
Each output terminated per Figure 37 with RL = 50 Ω
connected to VDD (nominal 1.8 V) instead of GND
322
VDD − 411
367
VDD − 367
398
VDD − 334
mV
mV
Each output terminated per Figure 37 with RL = 50 Ω
Each output terminated per Figure 37 with RL = 50 Ω
connected to VDD (nominal 1.8 V) instead of GND
Rev. 0 | Page 9 of 61
�AD9542
Data Sheet
TIME DURATION OF DIGITAL FUNCTIONS
Table 9.
Parameter
TIME DURATION OF DIGITAL
FUNCTIONS
EEPROM to Register Download
Time
Power-On Reset (POR)
Mx Pin to RESETB Rising Edge
Setup Time
Mx Pin to RESETB Rising Edge
Hold Time
Multiple Mx Pin Timing Skew
RESETB Falling Edge to Mx Pin
High-Z Time
TIME FROM START OF DPLL
ACTIVATION TO ACTIVE PHASE
DETECTOR OUTPUT
Untagged Operation
Min
Typ
Max
Unit
Test Conditions/Comments
ms
Using the Typical Configuration from Table 3
25
1
ms
ns
Time from power supplies > 80% to release of internal reset
Mx refers to Pin M0 through Pin M6
2
ns
39
14
ns
ns
Applies only to multibit Mx pin functions
10
tPFD
10
Tag
period
tPFD is the nominal phase detector period given by R/fREF, where R is the
frequency division factor determined by the R divider, and fREF is the
frequency of the active reference
Tag period = (tag ratio/fTAG), where fTAG is either fREF (for tagged reference
mode) or fFEEDBACK (for all other tagged modes); the tag ratio corresponds to
the selection of fTAG
10
Tagged Operation
DIGITAL PLL (DPLL0, DPLL1) SPECIFICATIONS
Table 10.
Parameter
DIGITAL PLL
Digital Phase Detector (DPD)
Input Frequency Range
Loop Filter
Profile 0
Bandwidth
Phase Margin
Closed-Loop Peaking
Profile 1
Bandwidth
Phase Margin
Closed-Loop Peaking
Min
Typ
1
0.0001
Max
Unit
2 × 10⁵
Hz
1850
Hz
Degrees
dB
Programmable design parameter; (fPFD/bandwidth) ≥ 20
305
Hz
Degrees
dB
Programmable design parameter; (fPFD/bandwidth) ≥ 20
70
1.1
0.0001
88.5
0.1
DIGITAL PLL NCO Division Ratio
NCO Integer
NCO Fraction
7
0.05
13
0.95
Test Conditions/Comments
In accordance with Telcordia GR-253-CORE jitter transfer
specifications
These specifications cover limitations on the DPLLx frequency
tuning word (FTW0); the AD9542 evaluation software frequency
planning wizard sets these values automatically for the user, and
the AD9542 evaluation software is available for download from
the AD9542 product page at www.analog.com/AD9542; NCO
division = 248/FTW0, which takes the form INT.FRAC, where INT is
the integer portion, and FRAC is the fractional portion
This is the integer portion of NCO division
This is the fractional portion of NCO division
Rev. 0 | Page 10 of 61
�Data Sheet
AD9542
DIGITAL PLL LOCK DETECTION SPECIFICATIONS
Table 11.
Parameter
PHASE LOCK DETECTOR
Threshold Programming Range
Threshold Resolution
FREQUENCY LOCK DETECTOR
Threshold Programming Range
Threshold Resolution
PHASE STEP DETECTOR
Threshold Programming Range
Threshold Resolution
Min
Typ
Max
Unit
224 − 1
ps
ps
224 − 1
ps
ps
232 − 1
ps
ps
Setting this value too low causes false triggers
Typ
Max
Unit
Test Conditions/Comments
±0.01
±0.1
ppb
AD9542 is configured using Configuration 1 from Table 21;
excludes frequency drift of system clock (SYSCLK) source;
excludes frequency drift of input reference prior to
entering holdover; 160 ms history timer; history holdoff
setting of 8; three holdover history features (bits) are
enabled: delay history until frequency lock bit, delay
history until phase lock bit, and delay holdover history
accumulation until not phase slew limited bit
268435
ppb
sec
10
1
10
1
100
1
Test Conditions/Comments
HOLDOVER SPECIFICATIONS
Table 12.
Parameter
HOLDOVER SPECIFICATIONS
Initial Frequency Accuracy
Min
Relative Frequency Accuracy
Between Channels
Cascaded Operation
History Averaging Window
0
0.001
ANALOG PLL (APLL0, APLL1) SPECIFICATIONS
Table 13.
Parameter
VCO FREQUENCY RANGE
Analog PLL0 (APLL0)
Analog PLL1 (APLL1)
PHASE FREQUENCY DETECTOR (PFD) INPUT FREQUENCY RANGE
LOOP BANDWIDTH
PHASE MARGIN
Min
Typ
2424
3232
162
260
68
Max
Unit
3232
4040
350
MHz
MHz
MHz
kHz
Degrees
OUTPUT CHANNEL DIVIDER SPECIFICATIONS
Table 14.
Parameter
OUTPUT PHASE ADJUST STEP SIZE
Min
1
Typ
Max
Unit
tVCO
Rev. 0 | Page 11 of 61
Test Conditions/Comments
tVCO = 1/(APLLx VCO frequency), where x = 0, 1
�AD9542
Data Sheet
SYSTEM CLOCK COMPENSATION SPECIFICATIONS
Table 15.
Parameter
DIRECT COMPENSATION
Resolution
CLOSED-LOOP COMPENSATION (AUXILIARY DPLL)
Phase Detector Frequency
Loop Bandwidth
Reference Monitor Threshold
Min
Typ
Max
0.028
2
0.1
200
2 × 10³
Unit
Test Conditions/Comments
ppt
ppt is parts per trillion (10−12)
5
kHz
Hz
%
Unit
Test Conditions/Comments
°C
%
°C
ms
°C
°C
TA = −50°C to +110°C
TA = −50°C to +110°C
16-bit (signed) resolution
TA = 25°C
500 hour stress test at 100°C
Max
Unit
TEMPERATURE SENSOR SPECIFICATIONS
Table 16.
Parameter
TEMPERATURE
Accuracy
Absolute
Relative
Resolution
Conversion time
REPEATABILITY
DRIFT
Min
Typ
Max
5
1.7
0.0078
0.18
±0.02
0.1
SERIAL PORT SPECIFICATIONS
Serial Port Interface (SPI) Mode
Table 17.
Parameter
CSB
Input Logic 1 Voltage
Input Logic 0 Voltage
Input Logic 1 Current
Input Logic 0 Current
SCLK
Input Logic 1 Voltage
Input Logic 0 Voltage
Input Logic 1 Current
Input Logic 0 Current
SDIO
As an Input
Input Logic 1 Voltage
Input Logic 0 Voltage
Input Logic 1 Current
Input Logic 0 Current
As an Output
Output Logic 1 Voltage
Output Logic 0 Voltage
SDO
Output Logic 1 Voltage
Output Logic 0 Voltage
Leakage Current
TIMING
Min
Typ
VDDIOA − 0.4
0.4
1
1
VDDIOA − 0.4
0.4
1
1
VDDIOA − 0.4
0.4
1
1
VDDIOA − 0.2
Test Conditions/Comments
Valid for VDDIOA = 3.3 V, 1.8 V, and 2.5 V
V
V
µA
µA
V
V
µA
µA
V
V
µA
µA
0.2
V
V
1 mA load current
1 mA load current
0.2
±1
V
V
µA
1 mA load current
1 mA load current
SDO inactive (high impedance)
Valid for VDDIOA = 3.3 V, 1.8 V, and 2.5 V
VDDIOA − 0.2
Rev. 0 | Page 12 of 61
�Data Sheet
Parameter
SCLK
Clock Rate, 1/tCLK
Pulse Width High, tHIGH
Pulse Width Low, tLOW
SDIO to SCLK Setup, tDS
SCLK to SDIO Hold, tDH
SCLK to Valid SDIO and SDO, tDV
CSB to SCLK Setup, tS
CSB to SCLK Hold, tC
CSB Minimum Pulse Width High
AD9542
Min
Typ
Max
Unit
50
MHz
ns
ns
ns
ns
ns
ns
ns
tCLK
5
9
2.2
0
9
1.5
0
1
Test Conditions/Comments
I2C Mode
Table 18.
Parameter
SDA, SCL (AS INPUTS)
Input Logic 1 Voltage
Input Logic 0 Voltage
Min
Input Current
Hysteresis of Schmitt Trigger Inputs
SDA (AS OUTPUT)
Output Logic 0 Voltage
Output Fall Time from VIH Minimum
to VIL Maximum
TIMING
SCL Clock Rate
Bus Free Time Between a Stop and
Start Condition, tBUF
Repeated Start Condition Setup
Time, tSU; STA
Repeated Hold Time Start
Condition, tHD; STA
Stop Condition Setup Time, tSU; STO
Low Period of the SCL Clock, tLOW
High Period of the SCL Clock, tHIGH
SCL/SDA Rise Time, tR
SCL/SDA Fall Time, tF
Data Setup Time, tSU; DAT
Data Hold Time, tHD; DAT
Capacitive Load for Each Bus Line, CB
−10
1.5
Typ
Max
70
0.3 ×
VDDIOA
+10
Unit
Test Conditions/Comments
Valid for VDDIOA = 3.3 V, 1.8 V, and 2.5 V
% of VDDIOA
V
µA
% of VDDIOA
For VIN = 10% to 90% of VDDIOA
0.2
250
V
ns
IOUT = 3 mA
10 pF ≤ CB ≤ 400 pF
400
1.3
kHz
µs
0.6
µs
0.6
µs
0.6
1.3
0.6
20 + 0.1 × CB
20 + 0.1 × CB
100
100
µs
µs
µs
ns
ns
ns
ns
pF
20 + 0.1 × CB
300
300
400
Rev. 0 | Page 13 of 61
After this period, the first clock pulse is
generated
�AD9542
Data Sheet
LOGIC INPUT SPECIFICATIONS (RESETB, M0 TO M6)
Table 19.
Parameter
RESETB
Input High Voltage (VIH)
Input Low Voltage (VIL)
Input Current High (IINH)
Input Current Low (IINL)
LOGIC INPUTS (M0 to M6)
Frequency Range
Input High Voltage (VIH)
Input Low Voltage (VIL)
Input Current (IINH, IINL)
Min
Typ
Max
Unit
VDDIOA − 0.4
V
V
µA
µA
0.4
1
±15
Test Conditions/Comments
Valid for 3.3 V ≥ VDDIOA ≥ 1.8 V; internal 100 kΩ pull-up resistor
±125
Valid for 3.3 V ≥ VDDIOx ≥ 1.8 V; VDDIOA applies to the M5 pin and
the M6 pin; VDDIOB applies to the M0, M1, M2, M3, and M4 pins;
the M3 and M4 pins have internal 100 kΩ pull-down resistors
51
MHz
V
V
µA
VDDIOx − 0.4
0.4
±125
±15
LOGIC OUTPUT SPECIFICATIONS (M0 TO M6)
Table 20.
Parameter
LOGIC OUTPUTS (M0 to M6)
Frequency Range
Output High Voltage (VOH)
Min
Typ
Max
Unit
26
MHz
V
V
V
V
VDDIOx − 0.6
VDDIOx – 0.2
Output Low Voltage (VOL)
0.6
0.2
Test Conditions/Comments
Valid for 3.3 V ≥ VDDIOx ≥ 1.8 V; VDDIOA applies for the M5 and
M6 pins; VDDIOB applies for M0 to M4; normal (default) output
drive current setting for M0 through M6
Load current = 10 mA
Load current = 1 mA
Load current = 10 mA
Load current = 1 mA
JITTER GENERATION (RANDOM JITTER)
Table 21.
Parameter
JITTER GENERATION
Min
Typ
Max
Unit
Test Conditions/Comments
System clock doubler enabled; high phase margin mode enabled;
there is not a significant jitter difference between driver modes
Channel 1 powered down
Device configuration: fSYSCLK = 52 MHz XTAL, fREF = 38.88 MHz, fVCO =
2488.32 MHz, fOUT = 155.52 MHz, BWDPLL = 50 Hz, phase buildout
operation
Device configuration: fSYSCLK = 52 MHz XTAL, fREF = 30.72 MHz, fVCO =
2457.6 MHz, fOUT = 245.76 MHz, BWDPLL = 50 Hz, internal zero delay
operation
Device configuration: fSYSCLK = 52 MHz XTAL, fCOMP = 19.2 MHz
temperature compensated crystal oscillator (TCXO), BWCOMP =
50 Hz, fREF = 1 Hz, fVCO = 2949.12 MHz, fOUT = 491.52 MHz, BWDPLL =
50 mHz, phase buildout operation
Device configuration: fSYSCLK = 52 MHz XTAL, fCOMP = 19.2 MHz TCXO,
BWCOMP = 50 Hz, fREF = 125 MHz, fVCO = 2500 MHz, fOUT = 125 MHz,
BWDPLL = 0.1 Hz, phase buildout operation
Device configuration: fSYSCLK = 52 MHz XTAL, fREF = 25 MHz, fVCO =
2500 MHz, fOUT = 312.5 MHz, BWDPLL = 50 Hz, phase buildout
operation
Device configuration: fSYSCLK = 52 MHz XTAL, fREF = 155.52 MHz, fVCO =
2620.5463 MHz, fOUT = (155.52 × 255/227) MHz, BWDPLL = 50 Hz
Channel 0—DPLL0, APLL0
RMS Jitter (12 kHz to 20 MHz)
Configuration 1—155.52 MHz
223
fs
Configuration 2—245.76 MHz
220
fs
Configuration 3—491.52 MHz
235
fs
Configuration 4—125 MHz
213
fs
Configuration 5—312.5 MHz
217
fs
Configuration 6—174.7030837 MHz
230
fs
Rev. 0 | Page 14 of 61
�Data Sheet
Parameter
Channel 1—DPLL1, APLL1
RMS Jitter (12 kHz to 20 MHz)
Configuration 1—155.52 MHz
AD9542
Min
Typ
Max
Unit
Test Conditions/Comments
Channel 0 powered down
247
fs
Configuration 2—245.76 MHz
280
fs
Configuration 3—491.52 MHz
323
fs
Configuration 4—125 MHz
243
fs
Configuration 5—312.5 MHz
266
fs
Configuration 6—174.7030837 MHz
264
fs
Device configuration: fSYSCLK = 52 MHz XTAL, fREF = 38.88 MHz, fVCO =
3265.92 MHz, fOUT = 155.52 MHz, BWDPLL = 50 Hz, phase buildout
operation, half divide enabled
Device configuration: fSYSCLK = 52 MHz XTAL, fREF = 30.72 MHz, fVCO =
3686.4 MHz, fOUT = 245.76 MHz, BWDPLL = 50 Hz, half divide enabled,
internal zero delay operation
Device configuration: fSYSCLK = 52 MHz XTAL, fCOMP = 19.2 MHz TCXO,
BWCOMP = 50 Hz, fREF = 1 Hz, fVCO = 3932.16 MHz, fOUT = 491.52 MHz,
BWDPLL = 50 mHz, phase buildout operation
Device configuration: fSYSCLK = 52 MHz XTAL, fCOMP = 19.2 MHz TCXO,
BWCOMP = 50 Hz, fREF = 125 MHz, fVCO = 3250 MHz, fOUT = 125 MHz,
BWDPLL = 0.1 Hz, phase buildout operation
Device configuration: fSYSCLK = 52 MHz XTAL, fREF = 25 MHz, fVCO =
3750 MHz, fOUT = 312.5 MHz, BWDPLL = 50 Hz, phase buildout
operation
Device configuration: fSYSCLK = 52 MHz XTAL, fREF = 155.52 MHz,
fVCO = 3319.3586 MHz, fOUT = (155.52 × 255/227) MHz, BWDPLL =
50 Hz, phase buildout operation
PHASE NOISE
Table 22.
Parameter
PHASE NOISE
Min
Typ
Max
Unit
Channel 0—DPLL0, APLL0
RMS Jitter (12 kHz to 20 MHz)
Configuration 1—155.52 MHz
Device configuration: fSYSCLK = 52 MHz XTAL, fREF = 38.88 MHz, fVCO
= 2488.32 MHz, fOUT = 155.52 MHz, BWDPLL = 50 Hz, phase
buildout operation
10 Hz Offset
100 Hz Offset
1 kHz Offset
10 kHz Offset
100 kHz Offset
1 MHz Offset
10 MHz Offset
Floor
Configuration 2—245.76 MHz
−81
−98
−118
−128
−134
−144
−158
−161
10 Hz Offset
100 Hz Offset
1 kHz Offset
10 kHz Offset
100 kHz Offset
1 MHz Offset
10 MHz Offset
Floor
Configuration 3—491.52 MHz
−77
−93
−114
−125
−130
−140
−156
−161
10 Hz Offset
100 Hz Offset
1 kHz Offset
Test Conditions/Comments
System clock doubler enabled; high phase margin mode
enabled; there is not a significant jitter difference between
driver modes
Channel 1 powered down
dBc/Hz
dBc/Hz
dBc/Hz
dBc/Hz
dBc/Hz
dBc/Hz
dBc/Hz
dBc/Hz
Device configuration: fSYSCLK = 52 MHz XTAL, fREF = 30.72 MHz, fVCO =
2457.6 MHz, fOUT = 245.76 MHz, BWDPLL = 50 Hz, internal zero delay
operation
dBc/Hz
dBc/Hz
dBc/Hz
dBc/Hz
dBc/Hz
dBc/Hz
dBc/Hz
dBc/Hz
Device configuration: fSYSCLK = 52 MHz XTAL, fCOMP = 19.2 MHz TCXO,
BWCOMP = 50 Hz, fREF = 1 Hz, fVCO = 2949.12 MHz, fOUT = 491.52 MHz,
BWDPLL = 50 mHz, phase buildout operation
−74
−89
−108
dBc/Hz
dBc/Hz
dBc/Hz
Rev. 0 | Page 15 of 61
�AD9542
Parameter
10 kHz Offset
100 kHz Offset
1 MHz Offset
10 MHz Offset
Floor
Configuration 4—125 MHz
Data Sheet
Min
Typ
−119
−123
−134
−152
−159
Unit
dBc/Hz
dBc/Hz
dBc/Hz
dBc/Hz
Test Conditions/Comments
Device configuration: fSYSCLK = 52 MHz XTAL, fCOMP = 19.2 MHz
TCXO, BWCOMP = 50 Hz, fREF = 125 MHz, fVCO = 2500 MHz, fOUT =
125 MHz, BWDPLL = 0.1 Hz, phase buildout operation
10 Hz Offset
100 Hz Offset
1 kHz Offset
10 kHz Offset
100 kHz Offset
1 MHz Offset
10 MHz Offset
Floor
Configuration 5—312.5 MHz
−84
−106
−120
−131
−136
−147
−160
−163
10 Hz Offset
100 Hz Offset
1 kHz Offset
10 kHz Offset
100 kHz Offset
1 MHz Offset
10 MHz Offset
Floor
Configuration 6—174.7030837 MHz
−74
−91
−112
−123
−128
−138
−154
−161
dBc/Hz
dBc/Hz
dBc/Hz
dBc/Hz
dBc/Hz
dBc/Hz
dBc/Hz
dBc/Hz
Device configuration: fSYSCLK = 52 MHz XTAL, fREF = 25 MHz, fVCO =
2500 MHz, fOUT = 312.5 MHz, BWDPLL = 50 Hz, phase buildout
operation
dBc/Hz
dBc/Hz
dBc/Hz
dBc/Hz
dBc/Hz
dBc/Hz
dBc/Hz
dBc/Hz
Device configuration: fSYSCLK = 52 MHz XTAL, fREF = 155.52 MHz, fVCO
= 2620.5463 MHz, fOUT = (155.52 × 255/227) MHz, BWDPLL = 50 Hz
10 Hz Offset
100 Hz Offset
1 kHz Offset
10 kHz Offset
100 kHz Offset
1 MHz Offset
10 MHz Offset
Floor
Channel 1—DPLL1, APLL1
RMS Jitter (12 kHz to 20 MHz)
Configuration 1—155.52 MHz
−82
−99
−117
−127
−133
−143
−157
−160
10 Hz Offset
100 Hz Offset
1 kHz Offset
10 kHz Offset
100 kHz Offset
1 MHz Offset
10 MHz Offset
Floor
Configuration 2—245.76 MHz
−81
−98
−118
−128
−132
−144
−158
−162
10 Hz Offset
100 Hz Offset
1 kHz Offset
10 kHz Offset
Max
dBc/Hz
dBc/Hz
dBc/Hz
dBc/Hz
dBc/Hz
dBc/Hz
dBc/Hz
dBc/Hz
Channel 0 powered down
Device configuration: fSYSCLK = 52 MHz XTAL, fREF = 38.88 MHz, fVCO =
3265.92 MHz, fOUT = 155.52 MHz, BWDPLL = 50 Hz, phase buildout
operation, half divide enabled
dBc/Hz
dBc/Hz
dBc/Hz
dBc/Hz
dBc/Hz
dBc/Hz
dBc/Hz
dBc/Hz
Device configuration: fSYSCLK = 52 MHz XTAL, fREF = 30.72 MHz, fVCO =
3686.4 MHz, fOUT = 245.76 MHz, BWDPLL = 50 Hz, half divide
enabled; internal zero delay operation
−76
−93
−114
−124
dBc/Hz
dBc/Hz
dBc/Hz
dBc/Hz
Rev. 0 | Page 16 of 61
�Data Sheet
Parameter
100 kHz Offset
1 MHz Offset
10 MHz Offset
Floor
Configuration 3—491.52 MHz
AD9542
Min
Typ
−127
−138
−156
−161
Unit
dBc/Hz
dBc/Hz
dBc/Hz
dBc/Hz
Test Conditions/Comments
Device configuration: fSYSCLK = 52 MHz XTAL, fCOMP = 19.2 MHz TCXO,
BWCOMP = 50 Hz, fREF = 1 Hz, fVCO = 3932.16 MHz, fOUT = 491.52 MHz,
BWDPLL = 50 mHz, phase buildout operation
10 Hz Offset
100 Hz Offset
1 kHz Offset
10 kHz Offset
100 kHz Offset
1 MHz Offset
10 MHz Offset
Floor
Configuration 4—125 MHz
−74
−90
−108
−118
−120
−131
−150
−160
10 Hz Offset
100 Hz Offset
1 kHz Offset
10 kHz Offset
100 kHz Offset
1 MHz Offset
10 MHz Offset
Floor
Configuration 5—312.5 MHz
−83
−106
−120
−131
−135
−145
−160
−163
10 Hz Offset
100 Hz Offset
1 kHz Offset
10 kHz Offset
100 kHz Offset
1 MHz Offset
10 MHz Offset
Floor
Configuration 6—174.7030837 MHz
−73
−91
−112
−122
−125
−137
−154
−161
10 Hz Offset
100 Hz Offset
1 kHz Offset
10 kHz Offset
100 kHz Offset
1 MHz Offset
10 MHz Offset
Floor
Max
dBc/Hz
dBc/Hz
dBc/Hz
dBc/Hz
dBc/Hz
dBc/Hz
dBc/Hz
dBc/Hz
Device configuration: fSYSCLK = 52 MHz XTAL, fCOMP = 19.2 MHz
TCXO, BWCOMP = 50 Hz, fREF = 125 MHz, fVCO = 3250 MHz, fOUT =
125 MHz, BWDPLL = 0.1 Hz, phase buildout operation
dBc/Hz
dBc/Hz
dBc/Hz
dBc/Hz
dBc/Hz
dBc/Hz
dBc/Hz
dBc/Hz
Device configuration: fSYSCLK = 52 MHz XTAL, fREF = 25 MHz, fVCO =
3750 MHz, fOUT = 312.5 MHz, BWDPLL = 50 Hz, phase buildout
operation
dBc/Hz
dBc/Hz
dBc/Hz
dBc/Hz
dBc/Hz
dBc/Hz
dBc/Hz
dBc/Hz
Device configuration: fSYSCLK = 52 MHz XTAL, fREF = 155.52 MHz, fVCO
= 3319.3586 MHz, fOUT = (155.52 × 255/227) MHz, BWDPLL = 50 Hz
−77
−99
−117
−127
−131
−142
−158
−161
dBc/Hz
dBc/Hz
dBc/Hz
dBc/Hz
dBc/Hz
dBc/Hz
dBc/Hz
dBc/Hz
Rev. 0 | Page 17 of 61
�AD9542
Data Sheet
ABSOLUTE MAXIMUM RATINGS
THERMAL RESISTANCE
Table 23.
Parameter
1.8 V Supply Voltage (VDD)
Input/Output Supply Voltage
(VDDIOA, VDDIOB)
Input Voltage Range (XOA, XOB,
REFA, REFAA, REFB, REFBB Pins)
Digital Input Voltage Range
SDO/M5, SCLK/SCL, SDIO/SDA,
CSB/M6 Pins
M0, M1, M2, M3, M4 Pins
Storage Temperature Range
Operating Temperature Range1
Lead Temperature (Soldering 10 sec)
1
Rating
2V
3.6 V
Thermal performance is directly linked to printed circuit board
(PCB) design and operating environment. Careful attention to
PCB thermal design is required.
−0.5 V to VDD + 0.5 V
Table 24. Thermal Resistance
−0.5 V to VDDIOA + 0.5 V
Symbol
θJA
−0.5 V to VDDIOB + 0.5 V
−65°C to +150°C
−40°C to +85°C
300°C
θJMA
θJMA
See the Thermal Resistance section for additional information.
Stresses at or above those listed under Absolute Maximum
Ratings may cause permanent damage to the product. This is a
stress rating only; functional operation of the product at these
or any other conditions above those indicated in the operational
section of this specification is not implied. Operation beyond
the maximum operating conditions for extended periods may
affect product reliability.
θJC
1
Thermal Characteristic Using a
JEDEC51-7 Plus JEDEC51-5 2S2P
Test Board1
Junction to ambient thermal
resistance, 0.0 m/sec airflow per
JEDEC JESD51-2 (still air)
Junction to ambient thermal
resistance, 1.0 m/sec airflow per
JEDEC JESD51-6 (moving air)
Junction to ambient thermal
resistance, 2.5 m/sec airflow per
JEDEC JESD51-6 (moving air)
Junction to case thermal resistance
(die to heat sink) per MIL-STD 883,
Method 1012.1
Value
23.92
Unit
°C/W
19.42
°C/W
18.22
°C/W
1.52
°C/W
The exposed pad on the bottom of the package must be soldered to ground
to achieve the specified thermal performance.
Values of θJA are for package comparison and PCB design
considerations. θJA provides for a first-order approximation of TJ
per the following equation:
TJ = TA + (θJA × PD)
where TA is the ambient temperature (°C).
Values of θJC are for package comparison and PCB design
considerations when an external heat sink is required.
ESD CAUTION
Rev. 0 | Page 18 of 61
�Data Sheet
AD9542
48
47
46
45
44
43
42
41
40
39
38
37
RESETB
REFA
REFAA
VDD
DNC
XOB
XOA
VDD
VDD
REFBB
REFB
M4
PIN CONFIGURATION AND FUNCTION DESCRIPTIONS
AD9542
TOP VIEW
(Not to Scale)
36
35
34
33
32
31
30
29
28
27
26
25
M3
M2
VDDIOB
M1
M0
VDD
LDO1
LF1
VDD
VDD
OUT1AN
OUT1AP
NOTES
1. EXPOSED PAD. THE EXPOSED PAD IS THE GROUND CONNECTION
ON THE CHIP. THE EXPOSED PAD MUST BE SOLDERED TO THE
ANALOG GROUND OF THE PCB TO ENSURE PROPER
FUNCTIONALITY AND FOR HEAT DISSIPATION, NOISE, AND
MECHANICAL STRENGTH BENEFITS.
2. DNC = DO NOT CONNECT. LEAVE THESE PINS FLOATING.
15826-002
VDD
OUT0BP
OUT0BN
DNC
OUT0CP
OUT0CN
VDD
VDD
DNC
OUT1BP
OUT1BN
VDD
13
14
15
16
17
18
19
20
21
22
23
24
SDO/M5 1
SCLK/SCL 2
VDDIOA 3
SDIO/SDA 4
CSB/M6 5
VDD 6
LDO0 7
LF0 8
VDD 9
VDD 10
OUT0AP 11
OUT0AN 12
Figure 2. Pin Configuration
Table 25. Pin Function Descriptions
Pin No.
1
Mnemonic
SDO/M5
Input/
Output
Output
Pin Type
CMOS
2
SCLK/SCL
Input
CMOS
3
VDDIOA
Input
Power
4
SDIO/SDA
Input/
output
CMOS
5
CSB/M6
Input/
output
CMOS
6, 9, 10, 13,
19, 20, 24,
27, 28, 31,
40, 41, 45
7
VDD
Input
Power
LDO0
Input
LDO bypass
8
LF0
11
OUT0AP
Input/
output
Output
12
OUT0AN
Output
Loop filter
for APLL0
HCSL, LVDS,
CML, CMOS
HCSL, LVDS,
CML, CMOS
Description
Serial Data Output (SDO). This pin is for reading serial data in 4-wire SPI mode.
Changes to the VDDIOA supply voltage affect the VIH and VOH values for this pin.
Configurable Input/Output (M5).This pin is a status and control pin when the
device is not in 4-wire SPI mode.
Serial Programming Clock (SCLK) Pin in SPI Mode. Changes to the VDDIOA supply
voltage affect the VIH and VOH values for this pin.
Serial Clock Pin (SCL) in I2C Mode. Changes to the VDDIOA supply voltage affect the
VIH and VOH values for this pin.
Serial Port Power Supply. The valid supply voltage is 1.8 V, 2.5 V, or 3.3 V. The
VDDIOA pin can be connected to the VDD supply bus if 1.8 V operation is desired.
Serial Data Input/Output in SPI Mode (SDIO). Write data to this pin in 4-wire SPI
mode. This pin has no internal pull-up or pull-down resistor. Changes to the VDDIOA
supply voltage affect the VIH and VOH values for this pin.
Serial Data Pin in I2C Mode (SDA).
Chip Select in SPI Mode (CSB). Active low input. Maintain a Logic 0 level on this pin
when programming the device in SPI mode. This pin has an internal 10 kΩ pull-up
resistor. Changes to the VDDIOA supply voltage affect the VIH and VOH values for this pin.
Configurable Input/Output (M6). This pin is a status and control pin when the
device is not in SPI mode.
1.8 V Power Supply.
APLL0 Loop Filter Voltage Regulator. Connect a 0.22 μF capacitor from this pin to
ground. This pin is the ac ground reference for the integrated APLL0 loop filter.
Loop Filter Node for APLL0. Connect a 3.9 nF capacitor from this pin to Pin 7
(LDO0).
PLL0 Output 0A.
PLL0 Complementary Output 0A.
Rev. 0 | Page 19 of 61
�AD9542
Data Sheet
Pin No.
14
Mnemonic
OUT0BP
Input/
Output
Output
15
OUT0BN
Output
16, 21, 44
17
DNC
OUT0CP
DNC
Output
18
OUT0CN
Output
22
OUT1BP
Output
23
OUT1BN
Output
25
OUT1AP
Output
26
OUT1AN
29
LF1
30
LDO1
Input/
Output
Input/
output
Input
32, 33, 35,
36, 37
M0, M1,
M2, M3, M4
Input/
output
CMOS
34
VDDIOB
Input
Power
38
REFB
Input
39
REFBB
Input
42
XOA
Input
1.8 V singleended or
differential
input
1.8 V singleended or
differential
input
Differential
input
43
XOB
Input
Differential
input
46
REFAA
Input
47
REFA
Input
48
RESETB
Input
1.8 V singleended or
differential
input
1.8 V singleended or
differential
input
1.8 V CMOS
logic
EP
EPAD
Output
Pin Type
HCSL, LVDS,
CML, CMOS
HCSL, LVDS,
CML, CMOS
No Connect
HCSL, LVDS,
CML, CMOS
HCSL, LVDS,
CML, CMOS
HCSL, LVDS,
CML, CMOS
HCSL, LVDS,
CML, CMOS
HCSL, LVDS,
CML, CMOS
HCSL, LVDS,
CML, CMOS
Loop filter
for APLL1
LDO bypass
Exposed
pad
Description
PLL0 Output 0B.
PLL0 Complementary Output 0B.
Do Not Connect. Leave these pins floating.
PLL0 Output 0C.
PLL0 Complementary Output 0C.
PLL1 Output 1B.
PLL1 Complementary Output 1B.
PLL1 Output 1A.
PLL1 Complementary Output 1A.
Loop Filter Node for APLL1. Connect a 3.9 nF capacitor from this pin to Pin 30 (LDO1).
APLL1 Loop Filter Voltage Regulator. Connect a 0.1 μF capacitor from this pin to
ground. This pin is the ac ground reference for the integrated APLL1 loop filter.
Configurable Input/Output Pins. These are status and control pins. Changes to the
VDDIOB supply voltage affect the VIH and VOH values for these pins. M3 and M4 have
internal 100 kΩ pull-down resistors. M0, M1, and M2 do not have internal resistors.
Mx Pin Power Supply. This power supply powers the digital section that controls
the M0 to M4 pins. Valid supply voltages are 1.8 V, 2.5 V, or 3.3 V. The VDDIOB pin
can be connected to the VDD supply bus if 1.8 V operation is desired.
Reference B Input. This internally biased input is typically ac-coupled; when
configured in this manner, it can accept any differential signal with a single-ended
swing up to the VDD power supply. If dc-coupled, the input can be LVDS or singleended 1.8 V CMOS.
Reference BB Input or Complementary Reference B Input. If REFB is in differential
mode, the REFB complementary signal is on this pin. No connection is necessary to
this pin if REFB is a single-ended input and REFBB is not used.
System Clock Input. XOA contains internal dc biasing and is ac-coupled with a 0.01 μF
capacitor except when using a crystal. When a crystal is used, connect the crystal
across XOA and XOB. A single-ended CMOS input is also an option, but it can
produce spurious spectral content when the duty cycle is not 50%. When using
XOA as a single-ended input, connect a 0.1 μF capacitor from XOB to ground.
Complementary System Clock Input. Complementary signal to XOA. XOB contains
internal dc biasing and is ac-coupled with a 0.1 μF capacitor except when using a
crystal. When a crystal is used, connect the crystal across XOA and XOB.
Reference AA input or Complementary REFA Input. If REFA is in differential mode,
the REFA complementary signal is on this pin. No connection is necessary to this
pin if REFA is a single-ended input and REFAA is not used. If dc-coupled, the input
is single-ended 1.8 V CMOS.
Reference A Input. This internally biased input is typically ac-coupled; when
configured in this manner, it can accept any differential signal with a single-ended
swing up to the VDD power supply. If dc-coupled, the input can be LVDS or singleended 1.8 V CMOS.
Active Low Chip Reset. This pin has an internal 100 kΩ pull-up resistor. When
asserted, the chip goes into reset. Changes to the VDDIOA supply voltage affect the
VIH values for this pin.
Exposed Pad. The exposed pad is the ground connection on the chip. The exposed
pad must be soldered to the analog ground of the PCB to ensure proper functionality
and for heat dissipation, noise, and mechanical strength benefits.
Rev. 0 | Page 20 of 61
�Data Sheet
AD9542
TYPICAL PERFORMANCE CHARACTERISTICS
–30
–30
–80
–90
–100
–110
–120
–130
–90
–100
–110
–120
–130
–140
–150
–150
–160
–160
100
1k
10k
100k
1M
100M
10M
–170
15826-201
10
FREQUENCY (Hz)
Figure 3. Absolute Phase Noise (PLL0, Configuration 1, HCSL Mode,
fREF = 38.88 MHz, fOUT = 155.52 MHz, fSYS = 52 MHz Crystal, 50 Hz DPLL BW)
10
100
1k
10k
100k
1M
10M
100M
FREQUENCY (Hz)
Figure 6. Absolute Phase Noise (PLL0, Configuration 4, HCSL Mode,
fREF = 125 MHz, fOUT = 125.0 MHz, fCOMP = 19.2 MHz TCXO, fSYS = 52 MHz Crystal,
0.1 Hz DPLL BW, Phase Buildout Mode)
–30
INTEGRATED RMS JITTER
(12kHz TO 20MHz): 220fs
fOUT = 245.76MHz
PHASE NOISE (dBc/Hz):
10Hz
–77
100Hz
–93
1kHz
–114
10kHz
–125
100kHz
–130
–140
1MHz
10MHz
–156
>30MHz
–158
FLOOR
–161
–50
–60
–70
–80
–90
–100
–50
–60
–110
–120
–130
–70
–80
–90
–100
–110
–120
–130
–140
–140
–150
–150
–160
–160
100
1k
10k
100k
1M
10M
–170
15826-202
–170
10
INTEGRATED RMS JITTER
(12kHz TO 20MHz): 217fs
fOUT = 312.5MHz
PHASE NOISE (dBc/Hz):
10Hz
–74
100Hz
–91
1kHz
–112
10kHz
–123
100kHz
–128
1MHz
–138
10MHz
–154
>30MHz
–157
FLOOR
–161
–40
PHASE NOISE (dBc/Hz)
–40
100M
FREQUENCY (Hz)
10
100
1k
10k
100k
1M
10M
100M
FREQUENCY (Hz)
15826-205
–30
PHASE NOISE (dBc/Hz)
–80
–140
–170
Figure 7. Absolute Phase Noise (PLL0, Configuration 5, HCSL Mode,
fREF = 25 MHz, fOUT = 312.5 MHz, fSYS = 52 MHz Crystal, 50 Hz DPLL BW,
Phase Buildout Mode)
Figure 4. Absolute Phase Noise (PLL0, Configuration 2, HCSL Mode,
fREF = 30.72 MHz, fOUT = 245.76 MHz, fSYS = 52 MHz Crystal, 50 Hz DPLL BW)
–30
–30
INTEGRATED RMS JITTER
(12kHz TO 20MHz): 234.5fs
fOUT = 491.52MHz
PHASE NOISE (dBc/Hz):
10Hz
–74
100Hz
–89
1kHz
–108
10kHz
–119
100kHz
–123
1MHz
–134
10MHz
–152
>30MHz
–155
FLOOR
–159
–50
–60
–70
–80
–90
–100
INTEGRATED RMS JITTER
(12kHz TO 20MHz): 230fs
fOUT = 174.7MHz
PHASE NOISE (dBc/Hz):
10Hz
–82
100Hz
–99
1kHz
–117
10kHz
–127
100kHz
–133
1MHz
–143
10MHz
–157
>30MHz
–158
FLOOR
–160
–40
–50
–60
PHASE NOISE (dBc/Hz)
–40
PHASE NOISE (dBc/Hz)
–70
–110
–120
–130
–140
–70
–80
–90
–100
–110
–120
–130
–140
–150
–150
–160
10
100
1k
10k
100k
FREQUENCY (Hz)
1M
10M
100M
15826-203
–160
–170
Figure 5. Absolute Phase Noise (PLL0, Configuration 3, HCSL Mode,
fREF = 1 Hz, fOUT = 491.52 MHz, fCOMP = 19.2 MHz TCXO, fSYS = 52 MHz Crystal,
50 MHz DPLL BW)
–170
10
100
1k
10k
100k
FREQUENCY (Hz)
1M
10M
100M
15826-206
PHASE NOISE (dBc/Hz)
–70
–50
–60
PHASE NOISE (dBc/Hz)
–50
–60
INTEGRATED RMS JITTER
(12kHz TO 20MHz): 213fs
fOUT = 125.0MHz
PHASE NOISE (dBc/Hz):
–84
10Hz
–106
100Hz
1kHz
–120
10kHz
–131
100kHz
–136
1MHz
–147
10MHz
–160
>30MHz
–160
FLOOR
–163
–40
15826-204
INTEGRATED RMS JITTER
(12kHz TO 20MHz): 224fs
fOUT = 155.52MHz
PHASE NOISE (dBc/Hz):
10Hz
–81
100Hz
–98
1kHz
–118
10kHz
–128
100kHz
–134
1MHz
–144
10MHz
–158
>30MHz
–159
FLOOR
–161
–40
Figure 8. Absolute Phase Noise (PLL0, Configuration 6, HCSL Mode,
fREF = 155.52 MHz, fOUT = 174.7 MHz, fSYS = 52 MHz Crystal, 50 Hz DPLL BW,
Phase Buildout Mode)
Rev. 0 | Page 21 of 61
�AD9542
Data Sheet
–30
INTEGRATED RMS JITTER
(12kHz TO 20MHz): 255fs
fOUT = 155.52MHz
PHASE NOISE (dBc/Hz):
–81
10Hz
100Hz
–98
–118
1kHz
–128
10kHz
100kHz
–132
–143
1MHz
10MHz
–158
–160
>30MHz
FLOOR
–162
–50
–70
–80
–90
–100
–50
–60
–110
–120
–130
–90
–100
–110
–120
–130
–140
–150
–160
–160
–170
–170
100
1k
10k
100k
1M
10M
100M
FREQUENCY (Hz)
10
100
1k
10k
100k
1M
10M
100M
FREQUENCY (Hz)
Figure 9. Absolute Phase Noise (PLL1, Configuration 1, HCSL Mode,
fREF = 38.88 MHz, fOUT = 155.52 MHz, fSYS = 52 MHz Crystal, 50 Hz DPLL BW)
Figure 12. Absolute Phase Noise (PLL1, Configuration 4, HCSL Mode,
fREF = 125 MHz, fOUT = 125 MHz, fCOMP = 19.2 MHz TCXO, fSYS = 52 MHz
Crystal, 0.1 Hz DPLL BW, Phase Buildout Mode)
–30
INTEGRATED RMS JITTER
(12kHz TO 20MHz): 280fs
fOUT = 245.76MHz
PHASE NOISE (dBc/Hz):
10Hz
–76
100Hz
–93
1kHz
–114
–124
10kHz
–127
100kHz
–138
1MHz
10MHz
–156
>30MHz
–159
FLOOR
–161
–50
–60
–70
–80
–90
–100
–50
–60
–110
–120
–130
–70
–80
–90
–100
–110
–120
–130
–140
–140
–150
–150
–160
–160
100
1k
10k
100k
1M
10M
100M
FREQUENCY (Hz)
–170
15826-208
–170
10
INTEGRATED RMS JITTER
(12kHz TO 20MHz): 266fs
fOUT = 312.5MHz
PHASE NOISE (dBc/Hz):
10Hz
–73
100Hz
–91
1kHz
–112
10kHz
–122
100kHz
–125
1MHz
–137
10MHz
–154
>30MHz
–158
FLOOR
–161
–40
PHASE NOISE (dBc/Hz)
–40
10
100
1k
10k
100k
1M
10M
100M
FREQUENCY (Hz)
15826-211
–30
Figure 13. Absolute Phase Noise (PLL1, Configuration 5, HCSL Mode,
fREF = 25 MHz, fOUT = 312.5 MHz, fSYS = 52 MHz Crystal, 50 Hz DPLL BW,
Phase Buildout Mode)
Figure 10. Absolute Phase Noise (PLL1, Configuration 2, HCSL Mode,
fREF = 30.72 MHz, fOUT = 245.76 MHz, fSYS = 52 MHz Crystal, 50 Hz DPLL BW)
–30
–30
INTEGRATED RMS JITTER
(12kHz TO 20MHz): 322.7fs
fOUT = 491.52MHz
PHASE NOISE (dBc/Hz):
10Hz
–74
100Hz
–90
1kHz
–108
10kHz
–118
100kHz
–120
1MHz
–131
10MHz
–150
>30MHz
–154
FLOOR
–160
–50
–60
–70
–80
–90
–100
–50
–60
–110
–120
–130
–70
–80
–90
–100
–110
–120
–130
–140
–140
–150
–150
–160
–160
100
1k
10k
100k
FREQUENCY (Hz)
1M
10M
100M
–170
15826-209
–170
10
INTEGRATED RMS JITTER
(12kHz TO 20MHz): 264fs
fOUT = 174.7MHz
PHASE NOISE (dBc/Hz):
10Hz
–77
100Hz
–99
1kHz
–117
10kHz
–127
100kHz
–131
1MHz
–142
10MHz
–158
>30MHz
–159
FLOOR
–161
–40
PHASE NOISE (dBc/Hz)
–40
Figure 11. Absolute Phase Noise (PLL1, Configuration 3, HCSL Mode,
fREF = 1 Hz, fOUT = 491.52 MHz, fCOMP = 19.2 MHz TCXO, fSYS = 52 MHz Crystal,
50 MHz DPLL BW)
10
100
1k
10k
100k
FREQUENCY (Hz)
1M
10M
100M
15826-212
PHASE NOISE (dBc/Hz)
–80
–150
10
PHASE NOISE (dBc/Hz)
–70
–140
15826-207
PHASE NOISE (dBc/Hz)
–60
INTEGRATED RMS JITTER
(12kHz TO 20MHz): 243fs
fOUT = 125.0MHz
PHASE NOISE (dBc/Hz):
10Hz
–83
100Hz
–106
1kHz
–120
–131
10kHz
–135
100kHz
–145
1MHz
10MHz
–160
–160
>30MHz
–163
FLOOR
–40
PHASE NOISE (dBc/Hz)
–40
15826-210
–30
Figure 14. Absolute Phase Noise (PLL1, Configuration 6, HCSL Mode,
fREF = 155.52 MHz, fOUT = 174.7 MHz, fSYS = 52 MHz Crystal, 50 Hz DPLL BW,
Phase Buildout Mode)
Rev. 0 | Page 22 of 61
�Data Sheet
AD9542
1.0
800
7.5mA MODE
15mA MODE
DIFFERENTIAL PEAK-TO-PEAK
VOLTAGE SWING (V p-p)
700
500
400
300
200
0
–0.2
–0.4
–0.6
0.6
0.8
1.0
1.2
TIME (Seconds)
1.4
1.6
1.8
2.0
0.8
0.8
DIFFERENTIAL PEAK-TO-PEAK
VOLTAGE SWING (V p-p)
0.2
0
–0.2
–0.4
–0.6
–0.8
HCSL, 7.5mA (SLEW RATE ~2.4V/ns)
CML, 7.5mA (SLEW RATE ~2.7V/ns)
HCSL, 15mA (SLEW RATE ~5.4V/ns)
CML, 15mA (SLEW RATE ~6V/ns)
–1.2
0
50
100
150
200
250
300
350
400
TIME (μs)
5
6
7
8
9
10
HCSL, 15mA
CML, 15mA
0.6
0.4
0.2
0
–0.2
–0.4
–0.6
–1.0
0
1
2
3
4
6
5
7
8
9
10
TIME (ns)
Figure 19. 491.52 MHz Output Waveform for15 mA Driver Settings;
HCSL Drivers Terminated 50 Ω to GND per Figure 32;
CML Drivers Terminated 50 Ω to 1.8 V per Figure 33
Figure 16. 8 kHz Output Waveforms for Various Driver Settings;
HCSL Drivers Terminated 50 Ω to GND per Figure 32;
CML Drivers Terminated 50 Ω to 1.8 V per Figure 33
2000
1.0
HCSL, 7.5mA, 10MHz
CML, 7.5mA, 10MHz
HCSL, 15mA, 10MHz
CML, 15mA, 10MHz
1800
DIFFERENTIAL PEAK-TO-PEAK
VOLTAGE SWING (mV p-p)
0.8
0.6
0.4
0.2
0
–0.2
–0.4
–0.6
1600
1400
1200
1000
800
600
CML, DIFFERENTIAL, 15mA
CML, DIFFERENTIAL, 12.5mA
CML, DIFFERENTIAL, 7.5mA
HCSL, DIFFERENTIAL, 15mA
HCSL, DIFFERENTIAL, 12.5mA
HCSL, DIFFERENTIAL, 7.5mA
400
200
0
20
40
60
80
100
120
140
160
180
200
TIME (ns)
15826-036
–0.8
–1.0
4
3
–0.8
15826-035
–1.0
2
Figure 18. 245.76 MHz Output Waveform for 15 mA Driver Settings;
HCSL Drivers Terminated 50 Ω to GND per Figure 32;
CML Drivers Terminated 50 Ω to 1.8 V per Figure 33
1.0
0.4
1
TIME (ns)
1.0
0.6
0
15826-037
0.4
15826-038
0.2
15826-040
0
–1.0
Figure 15. DC-Coupled, Single-Ended, 1 Hz Output Waveforms Using HCSL
7.5 mA and 15 mA Mode Terminated 50 Ω to GND per Figure 38;
Slew Rate: ~7 V/ns for 15 mA Mode; ~3.5 V/ns for 7.5 mA Mode
DIFFERENTIAL PEAK-TO-PEAK
VOLTAGE SWING (V p-p)
0.4
0.2
–0.8
100
DIFFERENTIAL PEAK-TO-PEAK
VOLTAGE SWING (V p-p)
0.6
0
1
10
100
1k
10k
100k
1M
10M
100M
FREQUENCY (Hz)
Figure 20. Differential Output Amplitude Waveforms;
HCSL Drivers Terminated 50 Ω to GND per Figure 32;
CML Drivers Terminated 50 Ω to 1.8 V per Figure 33
Figure 17. 10 MHz Output Waveforms for Various Driver Settings;
HCSL Drivers Terminated 50 Ω to GND per Figure 32;
CML Drivers Terminated 50 Ω to 1.8 V per Figure 33
Rev. 0 | Page 23 of 61
1G
15826-039
VOLTAGE (mV)
600
0
HCSL, 15mA
CML, 15mA
0.8
�AD9542
Data Sheet
BW
BW
BW
BW
BW
5
10mHz
100mHz
1Hz
10Hz
100Hz
CLOSED-LOOP GAIN (dB)
0
–5
–10
–15
–20
–25
PHASE MARGIN:88.5°
PEAKING: 1
YES
END
(TO RST_COUNT CHECK)
WRITE:
REGISTER 0x2000[2] = 1
WRITE:
REGISTER 0x000F = 0x01
CAL_COUNT =
CAL_COUNT + 1
SYSTEM CLOCK
LOCKED AND
STABLE POLLING LOOP
START TIMEOUT CLOCK:
TIME = 0
NO
REGISTER 0x3001[1:0] = 0x3
NO
TIMEOUT CLOCK:
TIME > SYSCLK_TO1
YES
YES
1SYSCLK_TO
IS A CALCULATED TIME OUT VALUE.
IT IS 50ms + SYSTEM CLOCK VALIDATION TIME (REGISTER 0x0207 TO REGISTER 0x0209 [UNITS OF ms])
Figure 44. System Clock Initialization Subprocess
Rev. 0 | Page 35 of 61
15826-102
END
�AD9542
Data Sheet
START
APLL RECALIBRATION
LOOP
CAL_COUNT = 0
WRITE:
CAL REG BIT 1 = 0
APLL
0
1
CAL REG.
0x2100
0x2200
LOCK REG. AUTO-SYNC REG.
0x3100
0x10DB
0x3200
0x14DB
SYNC REG.
0x2101
0x2201
VCO
CALIBRATION
OPERATION
NO
WRITE:
REGISTER 0x000F BIT 0 = 1
CAL_COUNT > 1
WRITE:
CAL REG BIT 1 = 1
YES
END
(TO RST_COUNT
CHECK)
WRITE:
REGISTER 0x000F BIT 0 = 1
CAL_COUNT =
CAL_COUNT + 1
APLL LOCK
DETECT POLLING
LOOP
START TIMEOUT CLOCK:
TIME = 0
NO
LOCK REG BIT 3 = 1
NO
TIMEOUT CLOCK:
TIME > 50ms
YES
YES
AUTO SYNC
REGISTERS[1:0] = 0
YES
WRITE:
SYNC REG BIT 3 = 1
MANUAL
DISTRIBUTION
SYNCHRONIZATION
OPERATION
WRITE:
REGISTER 0x000F BIT 0 = 1
WRITE:
SYNC REG BIT 3 = 0
WRITE:
REGISTER 0x000F BIT 0 = 1
15826-103
NO
END
Figure 45. Analog PLL Initialization Subprocess
Rev. 0 | Page 36 of 61
�Data Sheet
AD9542
STATUS AND CONTROL PINS
Mx PIN FUNCTION LOGIC
POWER UP
AUTOCONFIGURATION
Mx PINS
CONTROL
FUNCTION
SELECT
Mx PIN
CONTROL
REGISTERS
STATUS
SOURCE
SELECT
CONTROL
DESTINATIONS
I/O UPDATE
STATUS
SOURCES
15826-104
I/O
CONTROL
LATCHES
LATCHES
DEVICE
RESET
Figure 46. Mx Pin Logic
The AD9542 features seven independently configurable digital
CMOS status/control pins (M0 to M6). Configuring an Mx pin
as a status pin causes that pin to be an output. Conversely,
configuring an Mx pin as a control pin causes that pin to be an
input. Register 0x102 to Register 0x108 control both the nature
of the pin (either status or control via Bit D7), as well as the
selection of the status source or control destination associated
with the pin via Bits[D6:D0]. During power-up or reset, the
Mx pins temporarily become inputs and only allow the device to
autoconfigure. Figure 46 is a block diagram of the Mx pin
functionality.
The Mx pin control logic uses special register write detection
logic to prevent these pins from behaving unpredictably when the
Mx pin function changes, especially when changing mode from
input to output or vice versa.
When an Mx pin functions as an output, it continues operating
according to the prior function, even after the user programs
the corresponding registers. However, assertion of an input/output
update causes the corresponding pins to switch to the new
function according to the newly programmed register contents.
Note that changing from one output function to another output
function on an Mx pin does not require special timing to avoid
input/output contention on the pin.
When an Mx pin functions as an input, programming a particular
Mx pin function register causes all the Mx pin control functions
to latch their values. Assertion of an input/output update
switches to the newly programmed pin function, at which time
normal behavior resumes. Note that, when switching from one
input function to another input function on the same pin, the
logic state driven at the input to the pin can change freely
during the interval between writing the new function to the
corresponding register and asserting the input/output update.
When switching the operation of an Mx pin from an input to an
output function, the recommendation is that the external drive
source become high impedance during the interval between
writing the new function and asserting the input/output update.
When switching the operation of an Mx pin from an output to
an input, the recommendation is as follows. First, program the
Mx pin input function to no operation (NOOP) and assert the
input/output update. This configuration avoids input/output
contention on the Mx pin or other undesired behavior because,
prior to the assertion of the input/output update, the device
continues to drive the Mx pin. Following the assertion of the
input/output update, the device releases the Mx pin but ignores
the logic level on the pin due to the programmed NOOP function.
Note that the recommendation is to avoid using a high impedance
source on an Mx pin configured as an input because this may
cause excessive internal current consumption. Second, drive the
Mx pin with Logic 0 or Logic 1 via the desired external source
and program the associated Mx pin register from NOOP to the
desired function.
MULTIFUNCTION PINS AT RESET/POWER-UP
At power-up or in response to a reset operation, the Mx pins
enter a special operating mode. For a brief interval following a
power-up or reset operation, the Mx pins function only as
inputs (the internal drivers enter a high impedance state during
a power-up/reset operation). During this brief interval, the
device latches the logic levels at the Mx inputs and uses this
information to autoconfigure the device accordingly. The Mx
pins remain high-Z until either an EEPROM operation occurs,
in which case M1 or M2 become an I2C master, or the user (or
EEPROM) programs them to be outputs.
Rev. 0 | Page 37 of 61
�AD9542
Data Sheet
If the user does not connect external pull-up/pull-down resistors
to the Mx pins, the M3 and M4 pins have internal pull-down
resistors to ensure a predictable start-up configuration. In the
absence of external resistors, the internal pull-down resistors
ensure that the device starts up with the serial port in SPI mode
and without automatically loading data from an external EEPROM
(see Table 26). Although the M0, M1, M2, M5, and M6 pins are
high impedance at startup, connect external 100 kΩ pull-down
or pull-up resistors to these pins to ensure robust operation.
The Mx pin start-up conditions are shown in Table 26. M0, M1,
and M2 are excluded from Table 26 because these pins have no
explicit function during a power-up or reset operation.
Table 26. Mx Pin Function at Startup or Reset
Mx
Pin
M3
M4
M5
M6
Startup/Reset
Function
EEPROM load
function
Serial port
function
I2C address offset
I2C address offset
Logic 1
Load from
EEPROM
I²C mode
See Table 27
See Table 27
Logic 0
Do not load from
EEPROM (default)
SPI mode
(default)
See Table 27
See Table 27
Table 27. I²C Device Address Offset
1
M5
X1
0
1
0
1
M4
0
1
1
1
1
Table 28. Mx Receiver/Driver Bit Field Codes for Mx Status Pins
Code
00
Mode
CMOS,
active high
01
CMOS,
active low
PMOS,
open drain
NMOS,
open drain
10
When the start-up conditions select the serial port to be I2C
mode (that is, M4 is Logic 1 at startup), the M5 and M6 pins
determine the I2C port device address offset per Table 27. Note
that the logic levels in Table 27 only apply during a power-up or
reset operation.
M6
X1
0
0
1
1
When configured as a status pin, the output mode of an Mx pin
depends on a 2-bit mode code per Table 28. The 2-bit codes reside
in Register 0x100 through Register 0x101, where the 2-bit codes
constitute the Mx receiver/driver bit fields. Note that the Mx
receiver/driver bit fields perform a different function when the
Mx pin is a control pin (see the Control Functionality section).
11
Description
Output is Logic 0 when deasserted and
Logic 1 when asserted (default operating
mode).
Output is Logic 1 when deasserted and
Logic 0 when asserted.
Output is high impedance when deasserted
and active high when asserted.
Output is high impedance when deasserted
and active low when asserted.
The PMOS open-drain mode requires an external pull-down
resistor. The NMOS open-drain mode requires an external pull-up
resistor. Note that the open-drain modes enable the implementation of wire-OR’ed functionality of multiple Mx status pins
(including Mx status pins across multiple AD9542 devices or other
compatible devices—for example, to implement an IRQ bus).
The drive strength of an Mx status pin is programmable via the
corresponding Mx configuration bits (Bits[D6:D0] of the pin
drive strength register). Logic 0 (default) selects normal drive
strength (~6 mA) and Logic 1 selects weak drive strength (~3 mA).
CONTROL FUNCTIONALITY
Address Offset
Not applicable
1001000 (0x48)
1001001 (0x49)
1001010 (0x4A)
1001011 (0x4B)
Configuring an Mx pin as a control pin gives the user control of
the specific internal device functions via an external hardware
logic signal. Each Mx pin has a corresponding Mx function register.
To assign an Mx pin as a control pin, write a Logic 0 to the
Mx output enable bit in the corresponding Mx function register.
X means don’t care.
STATUS FUNCTIONALITY
Configuring an Mx pin as a status pin gives the user access to
specific internal device status/IRQ functions in the form of a
hardware pin that produces a logic signal. Each Mx pin has a
corresponding Mx function register. To assign an Mx pin as a
status pin, write a Logic 1 to the Mx output enable bit in the
corresponding Mx pin function register.
To assign a specific status/IRQ function to an Mx pin configured
as a status pin, program the appropriate 7-bit code (see Table 30)
to Bits[D6:D0] of the corresponding Mx function register.
See the Interrupt Request (IRQ) section for details regarding
IRQ functionality.
To assign an Mx control pin to a specific function, program the
appropriate 7-bit code (see Table 30) to Bits[D6:D0] of the
corresponding Mx function register. See the Interrupt Request
(IRQ) section for details regarding IRQ functionality.
When configured as an Mx control pin, the logical level applied
to the Mx pin translates to the selected device function. It is also
possible to assign multiple Mx control pins to the same control
function with the multiple pins implementing a Boolean expression. The Boolean operation associated with an Mx control pin
depends on a 2-bit code per Table 29. The 2-bit codes reside in
Register 0x100 through Register 0x101, where the 2-bit codes
constitute the Mx receiver/driver bit fields. Note that the Mx
receiver/driver bit fields perform a different function when the
Mx pin is a status pin (see the Status Functionality section).
Rev. 0 | Page 38 of 61
�Data Sheet
AD9542
Table 29. Mx Receiver/Driver Bit Field Codes for Mx Control
Pins
Code
00
Boolean
AND
01
NOT AND
10
OR
11
NOT OR
Description
Logical AND the associated Mx control pin
with the other Mx control pins assigned to
the same control function.
Invert the logical state of the associated Mx
control pin and AND it with the other Mx
control pins assigned to the same control
function.
Logical OR the associated Mx control pin with
the other Mx control pins assigned to the
same control function.
Invert the logical state of the associated Mx
control pin and OR it with the other Mx control
pins assigned to the same control function.
addition, M0 is assigned for AND operation, M2 for NOT OR
operation, M3 for NOT AND operation, and M6 for OR operation
(that is, the 2-bit codes in Register 0x100 and Register 0x101
according to Table 29). With these settings, the input/output
update function behaves according the following Boolean equation:
Input/output update = (!M2 || M6) && M0 && !M3
where:
! is logical NOT. Therefore, an input/output update occurs when
M0 is Logic 1 and M3 is Logic 0, and either M2 is Logic 0 or M6
is Logic 1.
&& is logical AND.
|| is logical OR.
The Boolean functionality of aggregated Mx control pins
follows a hierarchy whereby logical OR operations occur before
logical AND operations. The OR and NOT OR operations are
collectively grouped into a single result. A logical AND is then
performed using that result and the remaining AND and NOT
AND operations.
When an Mx control pin acts on a control function individually
(rather than as part of a group, per the previous example), the
Boolean functionality of the codes in Table 29 reduces to two
possibilities. Namely, Code 00 and Code 10 specify a Boolean
true (the Mx pin logic state applies to the corresponding control
function directly), whereas Code 01 and Code 11 specify a
Boolean false (the Mx pin logic state applies to the corresponding
control function with a logical inversion).
Consider a case where M0, M2, M3, and M6 are all assigned to
the input/output update control function; that is, Bits[D6:D0] in
Register 0x102 through Register 0x108 = 0x01 (see Table 30). In
Regarding the source and destination proxy columns in Table 30,
the &&, || and ! symbols denote the Boolean AND, OR, and
NOT operations, respectively.
Table 30. Mx Pin Status and Control Codes
Bits[D6:D0]
(Hex)
0x00
0x01
0x02
0x03
0x04
Control Function
No operation (NOOP)
IO_UPDATE
Device power down
Clear watchdog timer
Sync all
Destination Proxy
Not applicable
Register 0x000F, Bit D0
Register 0x2000, Bit D0
Register 0x2005, Bit D7
Register 0x2000, Bit D3
0x05
0x06
0x07
Unassigned
Unassigned
Unassigned
Not applicable
Not applicable
Not applicable
0x08
0x09
0x0A
0x0B
0x0C
0x0D
Unassigned
Unassigned
Unassigned
Unassigned
Unassigned
Unassigned
Not applicable
Not applicable
Not applicable
Not applicable
Not applicable
Not applicable
0x0E
0x0F
0x10
0x11
Not applicable
Not applicable
Register 0x2005, Bit D0
Register 0x2005, Bit D1
0x12
Unassigned
Unassigned
Clear all IRQ events
Clear common IRQ
events
Clear PLL0 IRQ events
Status Function
Logic 0, static
Logic 1, static
Digital core clock
Watchdog timer timeout
SYSCLK calibration in
progress
SYSCLK lock detect
SYSCLK stable
Channel 0 and Channel 1
PLLs locked
PLL0 locked
PLL1 locked
EEPROM save in progress
EEPROM load in progress
EEPROM fault detected
Temperature sensor limit
alarm
Unassigned
Unassigned
Any IRQ event
Common IRQ event
Register 0x2005, Bit D2
PLL0 IRQ event
0x13
Clear PLL1 IRQ events
Register 0x2005, Bit D3
PLL1 IRQ event
0x14
Unassigned
Not applicable
REFA demodulator clock
Rev. 0 | Page 39 of 61
Source Proxy (or Description)
Not applicable
Not applicable
Not applicable
Not applicable
Register 0x3001, Bit D2
Register 0x3001, Bit D0
Register 0x3001, Bit D1
Register 0x3001, Bit D4 && Bit D5
Register 0x3001, Bit D4
Register 0x3001, Bit D5
Register 0x3000, Bit D0
Register 0x3000, Bit D1
Register 0x3000, Bit D2 || Bit D3
Register 0x3002, Bit D0
Not applicable
Not applicable
The logical OR of all triggered IRQ events
The logical OR of all triggered common
IRQ events
The logical OR of all triggered PLL0 IRQ
events
The logical OR of all triggered PLL1 IRQ
events
Not applicable
�AD9542
Bits[D6:D0]
(Hex)
0x15
0x16
0x17
0x18
0x19
0x1A
0x1B
0x1C
Data Sheet
Control Function
Unassigned
Unassigned
Unassigned
Unassigned
Unassigned
Unassigned
Unassigned
Unassigned
Destination Proxy
Not applicable
Not applicable
Not applicable
Not applicable
Not applicable
Not applicable
Not applicable
Not applicable
0x1D
0x1E
0x1F
0x20
0x21
0x22
0x23
0x24
0x25
0x26
0x27
0x28
Unassigned
Unassigned
Unassigned
Fault REFA
Fault REFAA
Fault REFB
Fault REFBB
Unassigned
Unassigned
Unassigned
Unassigned
Timeout REFA
validation
0x29
Timeout REFAA
validation
0x2A
Timeout REFB
validation
0x2B
Timeout REFBB
validation
0x2C
0x2D
0x2E
0x2F
0x30
0x31
0x32
0x33
Unassigned
Unassigned
Unassigned
Unassigned
Not applicable
Not applicable
Not applicable
Unassigned
Not applicable
Not applicable
Not applicable
Register 0x2003, Bit D0
Register 0x2003, Bit D1
Register 0x2003, Bit D2
Register 0x2003, Bit D3
Not applicable
Not applicable
Not applicable
Not applicable
Register 0x2002, Bit D0
(validate REFA if faulted;
otherwise, no action)
Register 0x2002, Bit D1
(validate REFAA if
faulted; otherwise, no
action)
Register 0x2002, Bit D2
(validate REFB if faulted;
otherwise, no action)
Register 0x2002, Bit D3
(validate REFBB if
faulted; otherwise, no
action)
Not applicable
Not applicable
Not applicable
Not applicable
Not applicable
Not applicable
Not applicable
Not applicable
0x34
Unassigned
Not applicable
0x35
0x36
0x37
0x38
Unassigned
Unassigned
Unassigned
Unassigned
Not applicable
Not applicable
Not applicable
Not applicable
0x39
Unassigned
Not applicable
0x3A
Unassigned
Not applicable
0x3B
Unassigned
Not applicable
Status Function
Unassigned
REFAA demodulator clock
Unassigned
REFB demodulator clock
Unassigned
REFBB demodulator clock
Unassigned
REFA reference (R) divider
resync
REFAA R divider resync
REFB R divider resync
REFBB R divider resync
REFA faulted
REFAA faulted
REFB faulted
REFBB faulted
REFA valid
REFAA valid
REFB valid
REFBB valid
REFA active
Source Proxy (or Description)
Not applicable
Not applicable
Not applicable
Not applicable
Not applicable
Not applicable
Not applicable
Register 0x300D, Bit D3
REFAA active
This function represents a logical
combination of several registers and bits
REFB active
This function represents a logical
combination of several registers and bits
REFBB active
This function represents a logical
combination of several registers and bits
Not applicable
Not applicable
Feedback 0 active
Feedback 1 active
DPLL0 phase locked
DPLL0 frequency locked
APLL0 locked
APLL0 calibration in
progress
DPLL0 active
Not applicable
Not applicable
Not applicable
Not applicable
Register 0x3100, Bit D1
Register 0x3100, Bit D2
Register 0x3100, Bit D3
Register 0x3100, Bit D4
DPLL0 freerun
DPLL0 holdover
DPLL0 switching
DPLL0 tuning word history
status
DPLL0 tuning word
history updated
DPLL0 frequency
clamped
DPLL0 phase slew limited
Rev. 0 | Page 40 of 61
Register 0x300D, Bit D7
Register 0x300E, Bit D3
Register 0x300E, Bit D7
Register 0x3005, Bit D3
Register 0x3006, Bit D3
Register 0x3007, Bit D3
Register 0x3008, Bit D3
Register 0x3005, Bit D4
Register 0x3006, Bit D4
Register 0x3007, Bit D4
Register 0x3008, Bit D4
This function represents a logical
combination of several registers and bits
Register 0x3009, Bit D5 || Bit D4 || Bit D3 ||
Bit D2 || Bit D1 || Bit D0
Register 0x3101, Bit D0
Register 0x3101, Bit D1
Register 0x3101, Bit D2
Register 0x3102, Bit D0
Register 0x 3010, Bit D2
Register 0x3102, Bit D1
Register 0x3102, Bit D2
�Data Sheet
AD9542
Bits[D6:D0]
(Hex)
0x3C
Control Function
Unassigned
Destination Proxy
Not applicable
0x3D
0x3E
Unassigned
Unassigned
Not applicable
Not applicable
0x3F
Unassigned
Not applicable
0x40
PLL0 power-down
Register 0x2100, Bit D0
0x41
DPLL0 user freerun
Register 0x2105, Bit D0
0x42
DPLL0 user holdover
Register 0x2105, Bit D1
0x43
DPLL0 clear tuning
word history
Register 0x2107, Bit D1
PLL0 distribution
configuration error
0x44
Register 0x2101, Bit D3
Unassigned
Register 0x2105, Bit D4
Unassigned
Not applicable
Register 0x2105, Bit D5
Unassigned
Not applicable
Register 0x2105, Bit D6
Unassigned
Not applicable
Not applicable
Not applicable
Not applicable
Not applicable
Not applicable
Not applicable
Not applicable
Not applicable
Register 0x2102, Bit D2
Register 0x2102, Bit D3
Register 0x2102, Bit D5
Unassigned
Unassigned
Unassigned
Unassigned
Unassigned
Unassigned
Unassigned
Unassigned
DPLL1 phase locked
DPLL1 frequency locked
APLL1 locked
Not applicable
Not applicable
Not applicable
Not applicable
Not applicable
Not applicable
Not applicable
Not applicable
Register 0x3200, Bit D1
Register 0x3200, Bit D2
Register 0x3200, Bit D3
0x53
Synchronize PLL0
distribution dividers
DPLL0 translation
profile select, Bit 0
DPLL0 translation
profile select, Bit 1
DPLL0 translation
profile select, Bit 2
Unassigned
Unassigned
Unassigned
Unassigned
Unassigned
Unassigned
Unassigned
Unassigned
Mute OUT0A
Mute OUT0AA
Reset OUT0A/
OUT0AA driver
Mute OUT0B
Indicates when any one of the PLL0
distribution phase slew limiters is actively
limiting
Indicates when any one of the PLL0
distribution channel dividers
encountered a phase offset error
Not applicable
Register 0x2103, Bit D2
Register 0x3200, Bit D4
0x54
Mute OUT0BB
Register 0x2103, Bit D3
APLL1 calibration in
progress
DPLL1 active
0x55
Register 0x2103, Bit D5
DPLL1 freerun
Register 0x2104, Bit D2
Register 0x2104, Bit D3
Register 0x2104, Bit D5
DPLL1 holdover
DPLL1 switching
DPLL1 tuning word
history status
DPLL1 tuning word
history updated
DPLL1 frequency
clamped
DPLL1 phase slew limited
Register 0x3201, Bit D1
Register 0x3201, Bit D2
Register 0x3202, Bit D0
0x5C
Reset OUT0B/
OUT0BB driver
Mute OUT0C
Mute OUT0CC
Reset OUT0C/
OUT0CC driver
Mute OUT0xP/
OUT0xN
Reset OUT0xP/
OUT0xN drivers
Channel 0 N-shot
request
Unassigned
Register 0x3018, Bit D4
0x5D
Unassigned
Not applicable
PLL1 distribution
synchronized
Unassigned
0x45
0x46
0x47
0x48
0x49
0x4A
0x4B
0x4C
0x4D
0x4E
0x4F
0x50
0x51
0x52
0x56
0x57
0x58
0x59
0x5A
0x5B
Register 0x2101, Bit D1
Register 0x2101, Bit D2
Register 0x2101, Bit D0
Not applicable
Status Function
PLL0 distribution
synchronized
Unassigned
DPLL0 phase step
detected
DPLL0 fast acquisition
active
DPLL0 fast acquisition
complete
DPLL0 feedback divider
resync
PLL0 distribution phase
slew enable
Rev. 0 | Page 41 of 61
Source Proxy (or Description)
Register 0x3013, Bit D4
Not applicable
Register 0x3010, Bit D0
Register 0x3102, Bit D4
Register 0x3102, Bit D5
Register 0x3012, Bit D4
Register 0x300A, Bit D5 || Bit D4 || Bit D3 ||
Bit D2 || Bit D1 || Bit D0
Register 0x3201, Bit D0
Register 0x3015, Bit D2
Register 0x3202, Bit D1
Register 0x3202, Bit D2
Not applicable
�AD9542
Data Sheet
Bits[D6:D0]
(Hex)
0x5E
Control Function
Unassigned
Destination Proxy
Not applicable
0x5F
Unassigned
Not applicable
0x60
PLL1 power-down
Register 0x2200, Bit D0
0x61
DPLL1 force freerun
Register 0x2205, Bit D0
0x62
DPLL1 force holdover
Register 0x2205, Bit D1
0x63
DPLL1 clear tuning
word history
Register 0x2207, Bit D1
PLL1 distribution phase
control error OR’ed
0x64
Register 0x2201, Bit D3
Unassigned
Register 0x2205, Bit D4
Unassigned
Not applicable
Register 0x2205, Bit D5
Unassigned
Not applicable
Register 0x2205, Bit D6
Unassigned
Not applicable
Not applicable
Not applicable
Not applicable
Not applicable
Not applicable
Not applicable
Not applicable
Not applicable
Register 0x2202, Bit D2
Register 0x2202, Bit D3
Register 0x2202, Bit D5
Unassigned
Unassigned
Unassigned
Unassigned
Unassigned
Unassigned
Unassigned
Unassigned
Not applicable
Not applicable
Not applicable
Not applicable
Not applicable
Not applicable
Not applicable
Not applicable
Not applicable
Not applicable
Not applicable
Not applicable
Not applicable
Register 0x2203, Bit D2
Register 0x2203, Bit D3
Register 0x2203, Bit D5
Not applicable
Not applicable
Not applicable
Register 0x2201, Bit D1
Unassigned
Not applicable
Register 0x2201, Bit D2
Unassigned
Not applicable
Register 0x2201, Bit D0
0x7A
Unassigned
Not applicable
0x7B
0x7C
0x7D
0x7E
0x7F
Unassigned
Unassigned
Unassigned
Unassigned
Unassigned
Not applicable
Not applicable
Not applicable
Not applicable
Not applicable
Timestamp 0 event
detected
Timestamp 1 event
detected
Skew measurement
detected
Unassigned
Unassigned
Unassigned
Unassigned
Unassigned
Register 0x300E, Bit D2
0x79
Synchronize PLL1
distribution dividers
DPLL1 translation
profile select, Bit 0
DPLL1 translation
profile select, Bit 1
DPLL1 translation
profile select, Bit 2
Unassigned
Unassigned
Unassigned
Unassigned
Unassigned
Unassigned
Unassigned
Unassigned
Mute OUT1A
Mute OUT1AA
Reset OUT1A/OUT1AA
driver
Mute OUT1B
Mute OUT1BB
Reset OUT1B/OUT1BB
driver
Mute OUT1xP/OUT1xN
drivers
Reset OUT1xP/OUT1xN
drivers
Channel 1 N-shot
request
Unassigned
Indicates when any one of the PLL1
distribution phase slew limiters is actively
limiting
Indicates when any one of the PLL1
distribution channel dividers
encountered a phase offset error
Not applicable
0x65
0x66
0x67
0x68
0x69
0x6A
0x6B
0x6C
0x6D
0x6E
0x6F
0x70
0x71
0x72
0x73
0x74
0x75
0x76
0x77
0x78
Not applicable
Status Function
DPLL1 phase step
detected
DPLL1 fast acquisition
active
DPLL1 fast acquisition
complete
DPLL1 feedback divider
resync
PLL1 distribution phase
slew enable OR’ed
Rev. 0 | Page 42 of 61
Source Proxy (or Description)
Register 0x3015, Bit D0
Register 0x3202, Bit D4
Register 0x3202, Bit D5
Register 0x3017, Bit D4
Register 0x300E, Bit D3
Register 0x300E, Bit D4
Not applicable
Not applicable
Not applicable
Not applicable
Not applicable
�Data Sheet
AD9542
INTERRUPT REQUEST (IRQ)
The AD9542 monitors certain internal device events potentially
allowing them to trigger an IRQ event. Three groups of registers
(see Figure 47) control the IRQ functionality within the AD9542:
•
•
•
IRQ monitor registers (Register 0x300B through
Register 0x3019)
IRQ mask registers (Register 0x10C through Register 0x11A)
IRQ clear registers (Register 0x2006 through Register 0x2014)
The IRQ logic can indicate an IRQ event status result for any
specific device event(s) via the logical OR of the status of all the
IRQ monitor bits. In addition, the IRQ logic offers IRQ event
status results for particular groups of specific IRQ events,
namely, the PLL0 IRQs, PLL1 IRQs, and common IRQs (see
Figure 47).
The PLL0 IRQ group includes all device events associated with
DPLL0 and APLL0. The PLL1 IRQ group includes all device
events associated with DPLL1 and APLL1. The common IRQ
group includes events associated with the system clock, the
watchdog timer, and the EEPROM.
IRQ MONITOR
The IRQ monitor registers (in the general status section of the
register map) maintain a record of specific IRQ events. The
occurrence of a specific device event results in the setting and
latching of the corresponding bit in the IRQ monitor. The
output of the IRQ monitor provides the mechanism for
generating IRQ event status results (see the PLL0 IRQ, PLL1
IRQ, common IRQ, or any IRQ signal shown in Figure 47).
IRQ MASK
The IRQ mask registers (in the Mx pin status and control section
of the register map) comprise a bit for bit correspondence with
the specific IRQ event bits within the IRQ monitor. Writing a
Logic 1 to a mask bit enables (unmasks) the corresponding
specific device event to the IRQ monitor. A Logic 0 (default)
disables (masks) the corresponding specific device event to the
IRQ monitor. Therefore, a specific IRQ event is the result of a
logical AND of a specific device event and its associated IRQ,
mask bit.
The presence of the IRQ mask allows the user to select certain
device events for generating an IRQ event, while ignoring
(masking) all other specific device events from contributing to
an IRQ event status result (PLL0 IRQ, PLL1 IRQ, common IRQ
or any IRQ signal in Figure 47). Note that the default state of the
IRQ mask register bits is Logic 0; therefore, the device is not
capable of generating an IRQ event status result until the user
populates the IRQ mask with a Logic 1 to unmask the desired
specific IRQ events. Writing a Logic 1 to an IRQ mask bit may
result in immediate indication of an IRQ status event result if the
corresponding specific device event is already asserted (that is,
the device previously registered the corresponding device event).
IRQ CLEAR
The IRQ clear registers (in the operational controls section of
the register map) comprise a bit for bit correspondence with
the IRQ monitor. Writing a Logic 1 to an IRQ clear bit forces
the corresponding IRQ monitor bit to Logic 0, thereby clearing
that specific IRQ event. Note that the IRQ clear registers are
autoclearing; therefore, after writing a Logic 1 to an IRQ clear bit,
the device automatically restores the IRQ clear bit to Logic 0.
The IRQ event status results remain asserted until the user
clears all of the bits in the IRQ monitor responsible for the IRQ
status result (that is, the entire group of status bits associated
with PLL0 IRQ, PLL1 IRQ, common IRQ, or any IRQ signal
shown in Figure 47).
Although it is not recommended, in certain applications, it
may be desirable to clear an entire IRQ group all at one time.
Register 0x2005 provides four bits for clearing IRQ groups.
Bit D0 clears all IRQ monitor bits. Bit D1 clears the common
IRQ bits. Bit D2 clears the PLL0 IRQ bits. Bit D3 clears the
PLL1 IRQ bits.
Alternately, the user can program any of the multifunction pins
as an input for clearing an IRQ group, which allows clearing an
IRQ group with an external logic signal rather than by writing
to Register 0x2005 (see Figure 47).
The recommendation for clearing IRQ status events is to first
service the specific IRQ event (as needed) and then clear the
specific IRQ for that particular IRQ event. Clearing IRQ groups
via Register 0x2005 or via an Mx pin requires great care.
Clearing an IRQ group all at one time may result in the
unintentional clearing of one or more asserted IRQ monitor
bits. Clearing asserted IRQ monitor bits eliminates the record of
the associated device events, subsequently erasing any history of
those events having occurred.
Rev. 0 | Page 43 of 61
�AD9542
Data Sheet
CLEAR ALL IRQS
IRQ CLEAR
GROUP/ALL
BITS
CLEAR PLL0 IRQS
CLEAR PLL1 IRQS
CLEAR COMMON IRQS
PLL0 IRQ
COMMON IRQ
SPECIFIC IRQ EVENT STATUS
GROUPED
IRQ CLEAR
IRQ CLEAR BITS
IRQ MONITOR BITS
1 = ENABLE
0 = MASK (DEFAULT)
GROUPED DEVICE EVENTS
Figure 47. IRQ System Diagram
Rev. 0 | Page 44 of 61
ANY
IRQ
DEVICE EVENT SOURCES
IRQ MASK BITS
REGISTER 0x010C TO
REGISTER 0x011A
SPECIFIC DEVICE EVENTS
REGISTER 0x300B TO
REGISTER 0x3019
15826-005
REGISTER 0x2006 TO
REGISTER 0x2014
Mx PINS
PLL1 IRQ
GROUPED
IRQ EVENT
STATUS
Mx PIN FUNCTION LOGIC
REGISTER 0x2005
�Data Sheet
AD9542
WATCHDOG TIMER
or by assigning it directly to an Mx status pin. In the case of an
Mx status pin, the timeout event of the watchdog timer is a
pulse spanning 96 system clock periods (approximately 40 ns).
The watchdog timer is a general-purpose programmable timer
capable of triggering a specific IRQ event (see Figure 48). The
timer relies on the system clock, however; therefore, the system
clock must be present and locked for the watchdog timer to be
functional. The bit fields associated with the watchdog timer
reside in the Mx pin status and control function section of the
register map.
There are two ways to reset the watchdog timer, thereby preventing
it from indicating a timeout event. The first method is by
writing a Logic 1 to the clear watchdog bit (an autoclearing bit)
in the operational controls section of the register map.
Alternatively, the user can program any of the multifunction
pins as a control pin to reset the watchdog timer, which allows
the user to reset the timer by means of a hardware pin rather
than using the serial port.
The user sets the period of the watchdog timer by programming
the watchdog timer (ms) bit field with a 16-bit timeout value. A
nonzero value sets the timeout period in units of milliseconds,
providing a range of 1 ms to 65.535 sec, whereas a zero value
(0x0000, the default value) disables the timer. The relative accuracy
of the timer is approximately 0.1% with an uncertainty of
0.5 ms. Note that whenever the user writes a 16-bit timeout
value to the watchdog timer, it automatically clears the timer,
ensuring a correct timeout period (per the new value) starting
from the moment of the bit field update.
There are two typical cases for employing the watchdog timer.
Both cases assume that the watchdog timer output appears at
the output of an appropriately configured Mx status pin (the
watchdog timer output for the following case descriptions). The
first case is for an external device (for example, an FPGA or
microcontroller) to monitor the watchdog timer output using it
as a signal to carry out periodic housekeeping functions. The
second case is to have the watchdog timer output connected to
the external device, such that the assertion of the watchdog
output resets the external device. In this way, under normal
operation, the external device repeatedly resets the watchdog
timer by either writing Logic 1 to the clear watchdog bit or by
asserting an Mx control pin configured for clearing the watchdog.
In this way, as long as the external device keeps resetting the
watchdog timer before it times out, the watchdog timer does
not generate an output signal. As such, the watchdog timer does
not reset the external device. However, if the external device
fails to reset the watchdog timer before its timeout period
expires, the watchdog timer eventually times out, resetting the
external device via the appropriately configured Mx status pin.
The watchdog timer (ms) bit field relates to the timeout period
as follows:
Watchdog Timer (ms) = Timeout Period × 103
To determine the value of the watchdog timer (ms) bit field
necessary for a timeout period of 10 sec,
Watchdog Timer (ms) = Timeout Period × 103
= 10 × 103
= 10,000
= 0x2710 (hexadecimal)
If enabled, the timer runs continuously and generates a timeout
IRQ event when the timeout period expires. The user has access
to the watchdog timer status via its associated IRQ monitor bit
Mx PINS
Mx PIN FUNCTION LOGIC
CLEAR
WATCHDOG
CLEAR
WATCHDOG
VIA Mx PIN
WATCHDOG
OUTPUT VIA
Mx PIN
REGISTER 0x2005,
BIT D7
40ns
CLEAR
1kHz
CLK
TIMER
TO IRQ EVENT
SOURCE LOGIC
OUT
PRESET
= BIT(S) IN THE REGISTER MAP
REGISTER 0x010A TO REGISTER 0x010B
Figure 48. Watchdog Timer
Rev. 0 | Page 45 of 61
15826-105
TEXT
16
WATCHDOG
TIMER (MS)
�AD9542
Data Sheet
LOCK DETECTORS
DPLL LOCK DETECTORS
DPLL Phase Lock Detector
Each DPLL channel (DPLL0 and DPLL1) contains an all digital
phase lock detector. The user controls the threshold sensitivity
and hysteresis of the phase detector via the source profiles.
The phase lock detector provides the user with two status bits in
the status readback PLLx section the register map. The DPLLx
phase lock bit latches to Logic 1 when the DPLL changes state
from not phase locked to phase locked. The DPLLx phase unlock
bit latches to Logic 1 when the DPLL changes state from phase
locked to not phase locked. The DPLLx phase lock bits are
located in Register 0x3100 and 0x3200, respectively. Because
these bits can change dynamically, it is strongly recommended
that the user set an IRQ for these bits. When using the IRQ
function, it is possible for the IRQ status to indicate Logic 1 for
an IRQ function that was just enabled if that condition is true at
the time the IRQ is enabled. Therefore, the user must clear
them via the IRQ map clear DPLL0 (Register 0x200B to
Register 0x200F), IRQ map clear DPLL1 (Register 0x2010 to
Register 0x2014), sections of the register map to obtain visibility of
subsequent state transitions of the phase lock detector.
The phase lock detector behaves in a manner analogous to
water in a tub (see Figure 49). The total capacity of the tub
is 4096 units, with −2048 denoting empty, 0 denoting the 50%
point, and +2047 denoting full. The tub also has a safeguard to
prevent overflow. Furthermore, the tub has a low water mark
at −1025 and a high water mark at +1024. To change the water
level, the phase lock detector adds water with a fill bucket or
removes water with a drain bucket. To specify the size of the fill
and drain buckets, use the unsigned 8-bit Profile x phase lock fill
rate and Profile x phase lock fill rate bit field (where x is a value
from 0 through 7, corresponding to a particular source profile).
The water level in the tub is what the lock detector uses to
determine the lock and unlock conditions. When the water level
is below the low water mark (−1025), the lock detector indicates
an unlock condition. Conversely, when the water level is above
the high water mark (+1024), the lock detector indicates a lock
condition. When the water level is between the marks, the lock
detector holds its last condition. Figure 49 shows this concept
with an overlay of an example of the instantaneous water level
(vertical) vs. time (horizontal) and the resulting lock/unlock
states.
PREVIOUS
STATE
LOCKED
UNLOCKED
2047
During any given PFD phase error sample, the lock detector
either adds water with the fill bucket or removes water with the
drain bucket (one or the other, but not both). The decision of
whether to add or remove water depends on the threshold level
specified by the user in the 24-bit unsigned Profile x phase lock
threshold bit field. The bit field value is the desired threshold in
picoseconds. Thus, the phase lock threshold extends from 0 ps
to 16.7 µs and represents the phase error at the output of the
PFD. Though the programming range supports 0 ps as a lower
limit, in practice, the minimum value must be greater than 50 ps.
The phase lock detector compares the absolute value of each
phase error sample at the output of the PFD to the programmed
phase threshold value. If the absolute value of the phase error
sample is less than or equal to the programmed phase threshold
value, the detector control logic adds one fill bucket into the
tub. Otherwise, it removes one drain bucket from the tub. Note
that it is the magnitude, relative to the phase threshold value,
that determines whether to fill or drain the bucket, and not the
polarity of the phase error sample.
An exception to the fill/drain process occurs when the phase
slew limiter is active. When the phase slew limiter is actively in
the limiting process, the lock detector blocks fill events, allowing
only drain events to occur.
When more filling is taking place than draining, the water level
in the tub eventually rises above the high water mark (+1024),
which causes the lock detector to indicate lock. When more
draining is taking place than filling, the water level in the tub
eventually falls below the low water mark (−1024), which causes
the lock detector to indicate unlock. The ability to specify the
threshold level, fill rate, and drain rate enables the user to tailor
the operation of the lock detector to the statistics of the timing
jitter associated with the input reference signal. Note that, for
debug purposes, the user can make the fill or drain rate zero to
force the lock detector to indicate a lock or unlock state,
respectively.
Note that whenever the AD9542 enters freerun or holdover
mode, the DPLL phase lock detector indicates an unlocked state.
For more information on how to choose the appropriate phase
lock threshold, fill rate, and drain rate values for a given
application, refer to the AN-1061 Application Note.
DPLL Frequency Lock Detector
The operation of the frequency lock detector is identical to that
of the phase lock detector, with two exceptions:
•
LOCK LEVEL
1024
FILL
RATE DRAIN
RATE
UNLOCK LEVEL
–1025
–2048
15826-345
0
•
Figure 49. Lock Detector Diagram
Rev. 0 | Page 46 of 61
The fill or drain decision is based on the period deviation
between the reference of the DPLL and the feedback
signals, instead of the phase error at the output of the PFD.
The frequency lock detector is unaffected by the state of
the phase slew limiter.
�Data Sheet
AD9542
The frequency lock detector provides the user with two status
bits in the IRQ map DPLLx mask section of the register map. The
DPLLx frequency lock bit (where x is 0 or 1) latches to Logic 1
when the DPLL changes state from not frequency locked to
frequency locked. The DPLLx frequency unlock bit latches to
Logic 1 when the DPLL changes state from frequency locked to
not frequency locked. Because these are latched bits, the user
must clear them via the IRQ map DPLLx clear section of the
register map to obtain visibility of subsequent state transitions
of the frequency lock detector.
Consider a case where it is desirable to set the Profile x
frequency lock threshold bit field to meet the frequency
threshold when the signal from the reference TDC is 80 kHz
and the signal from the feedback TDC is 79.32 kHz (or vice
versa).
The frequency lock detector uses the 24-bit unsigned Profile x
frequency lock threshold bit field (where x is a value from 0
through 7, corresponding to a particular source profile),
specified in units of picoseconds. Thus, the frequency threshold
value extends from 0 ps to 16.7 µs and represents the absolute
value of the difference in period between the reference and
feedback signals at the input to the DPLL.
For more information on how to choose the appropriate frequency
lock threshold, fill rate, and drain rate values for a given application,
refer to the AN-1061 Application Note.
Profile x Frequency Lock Threshold = |1/fREF − 1/fFB|/10−12
= |1/80,000 − 1/79,320|/10−12
= 170,161 (nearest integer)
= 0x0298B1 (hexadecimal)
Profile x Frequency Lock Threshold = |1/fREF − 1/fFB|/10−12
where:
fREF is the frequency of the signal at the DPLL PFD reference
input.
fFB is the frequency of the signal at the DPLL PFD feedback
input.
Rev. 0 | Page 47 of 61
�AD9542
Data Sheet
PHASE STEP DETECTOR
PHASE STEP LIMIT
Although the AD9542 has the ability to switch between multiple
reference inputs, some applications use only one input and handle
reference switching externally (see Figure 50). Unfortunately,
this arrangement forfeits the ability of the AD9542 to mitigate
the output disturbance associated with a reference switchover,
because the reference switchover is not under the control of the
AD9542. However, the AD9542 offers a phase transient threshold
detection feature to help identify when an external reference
switchover occurs and to act accordingly.
SWITCHOVER
CONTROL
AD9542
REFx, REFxx
REFERENCE 2
15826-346
REFERENCE 1
Figure 50. External Reference Switching
Phase transient threshold detection works by monitoring the
output of the DPLL phase detector for phase transients, but in a
manner that is somewhat jitter tolerant. Otherwise, the phase
transient threshold detector is prone to false positives.
To activate the phase transient threshold detection, program the
32-bit unsigned Profile x phase step threshold bit field (where x
is a value from 0 through 7, corresponding to a particular
source profile). The default value is zero, which disables the phase
transient threshold detector. A nonzero value denotes the
desired phase step threshold in units of picoseconds per the
following equation:
Phase Step Threshold = Profile x Phase Step Threshold × 10−12
Note that the phase transient threshold detector is not active
unless the DPLL indicates frequency locked status.
As an example, determine the value of the Profile x phase step
threshold bit field necessary for a 12 ns limit. Solving the
previous equation for the phase step limit yields
Profile x Phase Step Threshold = (12 × 10−9)/10−12
= 12,000
= 0x00002EE0 (hexadecimal)
To reduce the likelihood of jitter induced threshold violations,
choose a phase step threshold of at least two times the expected
rms jitter (σJITTER) associated with the input reference signal.
Profile x Phase Step Threshold ≥ 2 × σJITTER
As such, in the previous example with Profile x phase step
threshold = 12,000, an input signal with 12 ns rms jitter is likely
to produce false positives because the signal violates the
previously described inequality. To reduce the likelihood of a
false positive, the inequality indicates Profile x phase step
threshold = 24,000 is a better choice. In fact, even with a value
of 24,000, there is still a slight probability of a jitter sample
exceeding 2 × σJITTER. As such, scaling σJITTER by four to six is an
even better choice.
When a phase transient occurs that exceeds the prescribed
value, one or both of the following two events occurs,
depending on the state of the enable step detect reference fault
bit in the operational control Channel 0 and Channel 1 (DPLL0
and DPLL1) sections of the register map:
•
•
Logic 0: the DPLL initiates a new acquisition sequence.
Logic 1: the reference monitor is reset.
When the enable step detect reference fault bit is Logic 0
(default), detection of a phase step causes only the first event to
occur. By initializing a new DPLL acquisition sequence, the
DPLL can take advantage of the fast acquisition feature,
assuming it is active, which is especially helpful for very low loop
bandwidth applications. In addition, a new acquisition manages
the impact of the phase step by either building out the phase or
slewing to the new phase in a hitless manner.
When the enable step detect reference fault bit is Logic 1,
detection of a phase step causes both events to occur. Because
exceeding the phase step threshold in this case implies an
external switch to a new reference, resetting the reference
monitor forces it to establish new reference statics.
The phase transient threshold detector provides the user with a
live status bit in the status readback PLLx section of the register
map, as well as a latched status bit in the IRQ map DPLLx read
section of the register map. The DPLLx phase step detect bit
(where x is 0 or 1) latches to Logic 1 on threshold violation of
the phase transient threshold detector. Because this is a latched
bit, the user must clear it via the IRQ map DPLLx clear section
of the register map to obtain visibility of subsequent threshold
violations detected by the phase step detector.
Mitigating Phase Step Limit False Positives
When enabled, the phase transient threshold detector operates
continuously, as long as the associated reference is the active
reference for the DPLL (DPLL0 or DPLL1, assuming the DPLL
is frequency locked. As such, any phase disturbance at the input
to the phase detector of the DPLL is subject to violating the
threshold of the phase transient threshold detector. This
violation includes a user induced phase adjustment via the
DPLLx phase offset bit field or the Profile x phase skew bit field.
To mitigate false triggering of the phase transient threshold
detector (when enabled) due to intentional phase adjustments,
the user can employ the phase slew rate limiter DPLL.
The following formula relates the maximum phase slew rate
(MPSR) necessary to prevent inadvertent triggering of the
phase transient threshold detector:
MPSR = (P + F)/7
where:
P is the phase transient threshold detector limit (in
picoseconds).
F is the frequency (in Hz) at the input of the DPLL phase
detector.
Rev. 0 | Page 48 of 61
�Data Sheet
AD9542
Note that this formula ignores other contributors to phase error,
including jitter, frequency offset, and propagation delay variation.
If the user has a prior knowledge of the timing of an external
event, such as the switching of the reference input clock source
via an external mux, rather than using the phase transient step
detector, a more robust solution is to invalidate the associated
reference manually. To do so, force a reference fault condition
via the appropriate operational controls bit field. Using this
method imposes the least impact on the steady state operation of
the device. The only steady state impact is that the validation
timer of the associated reference must be set to a duration that
is longer (with suitable margin) than the duration between the
assertion of the force fault condition and the occurrence of the
external event.
may have two or more GNSS/GPS sources that have identical
frequency but may exhibit a fixed time offset due to a mismatch
between antenna cable lengths.
To activate the skew adjustment feature, program the 24-bit
signed Profile x phase skew bit field (where x is the profile number,
Profile 0 to Profile 7). The default value is zero, which disables
the skew adjustment feature. A nonzero value enables the skew
adjustment feature and denotes the desired time skew in units
of picoseconds per the following equation:
Time Skew = Profile x Phase Skew × 10−12
As an example, determine the value of the Profile x phase skew
bit field necessary for a time skew of −35 ns. Solving the
previous equation for the Profile x phase skew yields
SKEW ADJUSTMENT
Profile x Phase Skew = (−35 × 10−9)/10−12
Skew adjustment allows the user to associate a fixed phase offset
with a reference input, which, for example, is useful in applications
with redundant GNSS/GPS reference sources. That is, a user
= 0xFF7748 (hexadecimal)
Rev. 0 | Page 49 of 61
= −35,000
�AD9542
Data Sheet
EEPROM USAGE
EEPROM Upload
OVERVIEW
The AD9542 supports an external, I C-compatible, EEPROM
with dedicated access. With some restrictions, the AD9542 also
supports multidevice access to a single external EEPROM on a
shared I2C common bus. The AD9542 has an on-chip I2C
master to interface to the EEPROM through the Mx pins.
To store the AD9542 register contents in the EEPROM, the user
must write a Logic 1 to the EEPROM save bit in the EEPROM
section of the register map. The EEPROM save bit does not
require an input/output update. Writing a Logic 1 to this bit
immediately triggers an upload sequence.
Because the default register settings of the AD9542 do not
define a particular frequency translation, the user must factory
program the EEPROM content before it can be downloaded to
the register map (either automatically or manually). If desired,
the user can store custom device configurations by manually
forcing an upload to the EEPROM via the register map.
The AD9542 has the equivalent of a write protect feature in that
the user must write a Logic 1 to the EEPROM write enable bit
(in the EEPROM section of the register map) prior to requesting an
upload to the EEPROM. Attempting to upload to the EEPROM
without first setting the EEPROM write enable bit results in a
fault indication (that is, the AD9542 asserts the EEPROM fault bit
in the general status section of the register map).
2
EEPROM CONTROLLER GENERAL OPERATION
EEPROM Controller
The EEPROM controller governs all aspects of communication
with the EEPROM. Because the I2C interface uses a 100 kHz
(normal mode) or 400 kHz (fast mode) communication link,
the controller runs synchronous to an on-chip generated clock
source suitable for use as the I2C serial clock. The on-chip oscillator
enables asynchronously immediately on a request for activation
of the controller. When the oscillator starts, it notifies the
controller of its availability, and the controller activates. After
the requested controller operation is complete, the controller
disables the clock generator and returns to an idle state.
EEPROM Download
An EEPROM download transfers contents from the EEPROM
to the AD9542 programming registers and invokes specific
actions per the instructions stored in the EEPROM (see Table 31).
Automatic downloading is the most common method for
initiating an EEPROM download sequence, which initiates at
power-up of the AD9542, provided Pin M3 is Logic 1 at powerup (see the Multifunction Pins at Reset/Power-Up section).
Alternatively, instead of cycling power to the AD9542 to initiate an
EEPROM download, the user can force the RESETB pin to
Logic 0, force Pin M3 to Logic 1, and then return the RESETB
pin to Logic 1 and remove the drive source from Pin M3.
The user can also request an EEPROM download on demand
(that is, without resetting or cycling power to the AD9542) by
writing a Logic 1 to the EEPROM load bit in the EEPROM
section of the register map.
Note that the load from EEPROM bit does not require an
input/output update. Writing a Logic 1 to this bit immediately
triggers a download sequence.
The EEPROM controller sets the EEPROM load in progress bit
(in the general status section of the register map) to Logic 1
while the download sequence is in progress as an indication to
the user that the controller is busy.
A prerequisite to an EEPROM upload is the existence of an upload
sequence stored in the 15-byte EEPROM sequence section of
the register map. That is, the user must store a series of upload
instructions (see the EEPROM Instruction Set section) in the
EEPROM sequence section of the register map prior to executing
an EEPROM upload.
The EEPROM controller performs an upload sequence by reading
the instructions stored in the EEPROM sequence section of the
register map byte by byte and executing them in order. That is,
the data stored in the EEPROM sequence section of the register
map are instructions to the EEPROM controller on what to
store in the EEPROM (including operational commands and
AD9542 register data).
Note that the EEPROM controller sets the EEPROM save in
progress bit (in the status readback section of the register map)
to Logic 1 while the upload sequence is in progress as an indication
to the user that the controller is busy.
Because the EEPROM sequence section of the register map is
only 15 bytes, it typically cannot hold enough instructions to
upload a complete set of AD9542 data to the EEPROM. Therefore,
most upload sequences necessitate that the user upload a series
of subsequences. For example, to accomplish a required upload
sequence consisting of 20 bytes of instructions, perform the
following procedure:
1.
2.
3.
4.
Rev. 0 | Page 50 of 61
Write the first 14 instructions to the EEPROM sequence
registers in the EEPROM section of the register map, with
the 15th instruction being a pause instruction (see Table 31).
Initiate an EEPROM upload by writing Logic 1 to the
EEPROM save bit. When the EEPROM controller reaches
the pause instruction, it suspends the upload process and
waits for another assertion of the EEPROM save bit.
While the controller pauses, write the remaining six bytes
of the upload sequence into the EEPROM sequence
registers in the EEPROM section of the register map,
followed by an end of data instruction (see Table 31).
Initiate an EEPROM upload by writing Logic 1 to the
EEPROM save bit. When the EEPROM controller reaches
the end of data instruction, it terminates the upload process.
�Data Sheet
AD9542
The previous procedure is an example of an upload sequence
consisting of two subsequences. Most upload sequences require
more than two subsequences; however, the procedure is the same.
Specifically, partition a long sequence into several subsequences
by using the pause instruction at the end of each subsequence
and the end of data instruction at the end of the final subsequence.
EEPROM Checksum
When the EEPROM controller encounters an end of data
instruction (see Table 31) during an upload sequence, it
computes a 32-bit cyclic redundancy check (CRC) checksum
and appends it to the stored data in the EEPROM. Similarly,
when the EEPROM controller executes a download sequence, it
computes a checksum on the fly. At the end of a download
sequence, the EEPROM controller compares the newly
computed checksum to the one stored in the EEPROM. If the
two checksums do not match, the EEPROM controller asserts
the EEPROM CRC error bit in the status readback section of
the register map.
To minimize the possibility of downloading a corrupted
EEPROM data set, the user can execute a checksum test by
asserting the verify EEPROM CRC bit in the EEPROM section
of the register map, which causes the EEPROM controller to
execute a download sequence, but without actually transferring
data to the AD9542 registers. The controller still computes an
on the fly checksum, performs the checksum comparison, and
asserts the EEPROM CRC error bit if the checksums do not
match. Therefore, after the device deasserts the EEPROM load
in progress bit, the user can check the EEPROM CRC fault bit
to determine if the test passed (that is, EEPROM CRC error = 0).
However, even if the test fails, device operation is unaffected
because there was no transfer of data to the AD9542 registers.
EEPROM Header
The EEPROM controller adds a header to stored data that
carries information related to the AD9542, such as
•
•
•
•
Vendor ID
Chip type
Product ID
Chip revision
At the beginning of an EEPROM download sequence, the
EEPROM controller compares the stored header values to the
values in the corresponding registers of the AD9542. If the
controller detects a mismatch, it asserts the EEPROM fault bit
in the status readback section of the register map and
terminates the download.
EEPROM INSTRUCTION SET
The EEPROM controller relies on a combination of instructions
and data. An instruction consists of a single byte (eight bits).
Some instructions require subsequent bytes of payload data.
That is, some instructions are self contained operations, whereas
others are directions on how to process subsequent payload
data. A summary of the EEPROM controller instructions is
shown in Table 31.
When the controller downloads the EEPROM contents to the
AD9542 registers, it does so in a linear fashion, stepping
through the instructions stored in the EEPROM. However, when
the controller uploads to the EEPROM, the sequence is a nonlinear
combination of various parts of the register map, as well as
computed data that the controller calculates on the fly.
Table 31. EEPROM Controller Instruction Set Summary
Instruction Code
(Hexadecimal)
0x00 to 0x7F
0x80
0x81 to 0x8F
0x90
0x91
0x92
0x93
0x94 to 0x97
0x98
0x99
0x9A
0x9B to 0x9F
0xA0
0xA1
0xA2
0xA3 to 0xAF
0xB0
0xB1 to 0xBF
0xC0 to 0xFD
0xFE
0xFF
Response
Register transfer
Input/output update
Not applicable
Calibrate APLLs
Calibrate the system clock PLL
Calibrate APLL0
Calibrate APLL1
Not applicable
Force freerun
Force DPLL0 freerun
Force DPLL1 freerun
Not applicable
Synchronize outputs
Synchronize Channel 0
Synchronize Channel 1
Not applicable
Clear condition
Set condition
Not applicable
Pause
End of data
Comments
Requires a 2-byte register address suffix
Assert input/output update during download
Undefined
Calibrate the system clock PLL, APLL0, and APLL1 during download
Calibrate only the system clock PLL during download
Calibrate only APLL0 during download
Calibrate only APLL1 during download
Reserved/unused
Force DPLL0 and DPLL1 to freerun during download
Force only DPLL0 to freerun during download
Force only DPLL1 to freerun during download
Reserved/unused
Synchronize all distribution outputs during download
Synchronize only Channel 0 distribution outputs during download
Synchronize only Channel 1 distribution outputs during download
Reserved/unused
Apply Condition 0 and reset the condition map
Apply Condition 1 to Condition 15, respectively
Undefined
Pause the EEPROM upload sequence
Marks the end of the instruction sequence
Rev. 0 | Page 51 of 61
�AD9542
Data Sheet
Register Transfer Instructions (0x00 to 0x7F)
Condition Value
Instructions with a hexadecimal value from 0x00 through 0x7F
indicate a register transfer operation. Register transfer instructions
require a 2-byte suffix, which constitutes the starting address of
the AD9542 register targeted for transfer (where the first byte
to follow the data instruction is the most significant byte of the
register address). When the EEPROM controller encounters a
data instruction, it knows to interpret the next two bytes as the
register map target address.
The condition value has a one to one correspondence to the
conditional instruction. Specifically, the condition value is the
value of the conditional instruction minus 0xB0. Therefore,
condition values have a range of 0 to 15. The EEPROM controller
uses condition values in conjunction with the condition map,
while the user uses a condition value to populate the EEPROM
load condition bit field of the register map with a condition ID.
Note that the value of the register transfer instruction encodes
the payload length (number of bytes). That is, the EEPROM
controller knows how many register bytes to transfer to/from
the indicated register by adding 1 to the instruction value. For
example, Data Instruction 0x1A has a decimal value of 26;
therefore, the controller knows to transfer 27 bytes to and from
the target register (that is, one more than the value of the
instruction).
Input/Output Update Instruction (0x80)
When the EEPROM controller encounters an input/output
update instruction during an upload sequence, it stores the
instruction in EEPROM. When encountered during a download
sequence, however, the EEPROM controller initiates an
input/output update event (equivalent to the user asserting the
IO_UPDATE bit in the serial port section of the register map).
Device Action Instructions (0x90 to 0xAF)
When the EEPROM controller encounters a device action
instruction during an upload sequence, it stores the instruction
in EEPROM. When encountered during a download sequence,
however, the EEPROM controller executes the specified action
per Table 31.
Conditional Instructions (0xB0 to 0xBF)
The conditional instructions allow conditional execution of
EEPROM instructions during a download sequence. During an
upload sequence, however, they are stored as is and have no
effect on the upload process.
Conditional processing makes use of four elements:
•
•
•
•
The conditional instruction.
The condition value.
The condition ID.
The condition map.
Conditional Instruction
When the EEPROM controller encounters a conditional
instruction during an upload sequence, it stores the instruction
in the EEPROM. When the EEPROM controller detects a
conditional instruction during a download sequence, it affects
the condition map as well as the outcome of conditional processing.
Condition ID
The condition ID is the value stored in the 4-bit EEPROM load
condition bit field in the EEPROM section of the register map.
The EEPROM controller uses the condition ID in conjunction
with the condition map to determine which instructions to
execute or ignore during a download sequence.
Condition Map
The condition map is a table maintained by the EEPROM
controller consisting of a list of condition values. When the
EEPROM controller encounters a conditional instruction
during a download sequence, it determines the corresponding
condition value of the instruction (0 to 15). If the condition
value is nonzero, the EEPROM controller places the condition
value in the condition map. Conversely, if the condition value
is zero, the controller clears the condition map and applies
Condition 0. Condition 0 causes all subsequent instructions to
execute unconditionally (until the controller encounters a new
conditional instruction that causes conditional processing).
Conditional Processing
While executing a download sequence, the EEPROM controller
executes or skips instructions depending on the condition ID
and the contents of the condition map (except for the conditional and end of data instructions, which always execute
unconditionally).
If the condition map is empty or the condition ID is zero, all
instructions execute unconditionally during download. However,
if the condition ID is nonzero and the condition map contains a
condition value matching the condition ID, the EEPROM
controller executes the subsequent instructions. Alternatively,
if the condition ID is nonzero but the condition map does not
contain a condition value matching the condition ID, the
EEPROM controller skips instructions until it encounters a
conditional instruction with a condition value of zero or a
condition value matching the condition ID.
Note that the condition map allows multiple conditions to exist
at any given moment. This multiconditional processing mechanism enables the user to have one download instruction sequence
with many possible outcomes, depending on the value of the
condition ID and the order in which the controller encounters
conditional instructions. An example of the use of conditional
processing is shown in Table 32.
Rev. 0 | Page 52 of 61
�Data Sheet
AD9542
Table 32. Example Conditional Processing Sequence
0xB2
0xB3
0x00 to 0x7F
0x91
0xB0
0x80
0xFF
M2
35
33
4
2
33
4
2
M2
35
SCL
SDA
EEPROM
CPU
SCL
SDA
SCL SDA
15826-347
0xB1
0x00 to 0x7F
Operation
A sequence of register transfer instructions
that execute unconditionally
Apply Condition 1
A sequence of register transfer instructions
that execute only if the condition ID is 1
Apply Condition 2
Apply Condition 3
A sequence of register transfer instructions that
execute only if the condition ID is 1, 2, or 3
Calibrate the system clock PLL
Clear condition map
Input/output update
Terminate sequence
DEVICE 2
SCL SDA
M1
SCL SDA
Figure 51. Level 1 Multidevice Configuration
AD9542
AD9542
DEVICE 1
SCL SDA
M1
2
4
33
M2
DEVICE 2
M1
SCL SDA
35
2
4
33
M2
35
SDA
SCL
SCL SDA
SCL SDA
CPU
EEPROM
15826-348
Instruction
0x00 to 0x7F
AD9542
AD9542
DEVICE 1
SCL SDA
M1
Figure 52. Level 2 Multidevice Configuration
Pause Instruction (0xFE)
The EEPROM controller only recognizes the pause instruction
during an upload sequence. Upon encountering a pause
instruction, the EEPROM controller enters an idle state, but
preserves the current value of the EEPROM address pointer.
One use of the pause instruction is for saving multiple, yet
distinct, values of the same AD9542 register, which is useful for
sequencing power-up conditions.
The pause instruction is also useful for executing an upload
sequence requiring more space than is available in the EEPROM
sequence registers in the EEPROM section of the register map
(see the EEPROM Upload section).
End of Data Instruction (0xFF)
When the EEPROM controller encounters an end of data
instruction during an upload sequence, it stores the instruction
in EEPROM along with the computed checksum, clears the
EEPROM address pointer, and then enters an idle state. When
encountered during a download sequence, however, the
EEPROM controller clears the EEPROM address pointer,
verifies the checksum, and then enters an idle state.
Note that during EEPROM downloads, condition instructions
always execute unconditionally.
MULTIDEVICE SUPPORT
Multidevice support enables multiple AD9542 devices to share
the contents of a single EEPROM. There are two levels of
multidevice support. Level 1 supports a configuration where
multiple AD9542 devices share a single EEPROM through a
dedicated I2C bus. Level 2 supports a configuration where
multiple AD9542 devices share a single EEPROM connected to
a common I2C bus that includes other I2C master devices.
Figure 51 and Figure 52 show the Level 1 and Level 2
configurations, respectively.
Multidevice Bus Arbitration
The EEPROM controller implements bus arbitration by
continuously monitoring the SDA and SCL bus signals for start
and stop conditions. The controller can determine whether the
bus is idle or busy. If the bus is busy, the EEPROM controller
delays its pending I2C transfer until a stop condition indicates
that the bus is available.
Bus arbitration is essential in cases where two I2C master
devices simultaneously attempt an I2C transfer. For example, if
one I2C master detects that SDA is Logic 0 when it is intended to be
Logic 1, it assumes that another I2C master is active and immediately terminates its own attempt to transfer data. Similarly, if
one I2C master detects that SCL is Logic 0 prior to entering a
start state, it assumes that another I2C master is active and stalls
its own attempt to drive the bus.
In either case, the prevailing I2C master completes its current
transaction before releasing the bus. Because the postponed I2C
master continuously monitors the bus for a stop condition, it
attempts to seize the bus and carry out the postponed transaction
on detection of such a stop condition.
The EEPROM controller includes an arbitration timer to optimize
the bus arbitration process. Specifically, when the EEPROM
controller postpones an I2C transfer as a result of detecting bus
contention, it starts the arbitration timer. If the EEPROM controller
fails to detect a stop condition within 255 SCL cycles, it attempts
to force another transaction. If the bus is still busy, the EEPROM
controller restarts the arbitration timer, and the process continues
until the EEPROM controller eventually completes the pending
transaction.
Rev. 0 | Page 53 of 61
�AD9542
Data Sheet
Multidevice Configuration Example
Table 33. Template for a Multidevice EEPROM Sequence
Consider two AD9542 devices (Device 1 and Device 2) that
share a single EEPROM, and assume both devices have a
common PLL0 configuration but differing PLL1 configurations.
Instructions
0x00 to 0x7F
A template for an EEPROM sequence that accomplishes this
configuration is shown in Table 33. The sequence relies on
conditional processing to differentiate between Device 1 and
Device 2. Therefore, the user must program the condition ID
of both devices prior to executing an EEPROM download.
Specifically, the user must program the EEPROM load condition
bit field of Device 1 with a condition ID of 1 and Device 2 with
a condition ID of 2.
0xB1
0x00 to 0x7F
0xB0
0xB2
0x00 to 0x7F
0xB0
0x80
0xFF
Rev. 0 | Page 54 of 61
Comment
A sequence of register transfer instructions
associated with the PLL0 configuration
common to both devices
Apply Condition 1
A sequence of register transfer instructions
associated with the PLL1 configuration
specific to Device 1
Clear the condition map
Apply Condition 2
A sequence of register transfer instructions
associated with the PLL1 configuration
specific to Device 2
Clear the condition map
Input/output update
End of sequence
�Data Sheet
AD9542
SERIAL CONTROL PORT
The AD9542 serial control port is a flexible, synchronous serial
communications port that provides a convenient interface to
many industry-standard microcontrollers and microprocessors.
The AD9542 serial control port is compatible with most
synchronous transfer formats, including I²C, Motorola SPI, and
Intel SSR protocols. The serial control port allows read/write
access to the AD9542 register map.
The AD9542 uses the Analog Devices unified SPI protocol (see
the Analog Devices Serial Control Interface Standard). The
unified SPI protocol guarantees that all new Analog Devices
products using the unified protocol have consistent serial port
characteristics. The SPI port configuration is programmable via
Register 0x00.
Unified SPI differs from the SPI port found on older Analog
Devices products, such as the AD9557 and AD9558, in the
following ways:
•
•
•
Unified SPI does not have byte counts. A transfer is
terminated when the CSB pin goes high. The W1 and W0
bits in the traditional SPI become the A12 and A13 bits of
the register address. This is similar to streaming mode in
the traditional SPI.
The address ascension bit (Register 0x00) controls whether
register addresses are automatically incremented or
decremented regardless of the LSB/MSB first setting. In
traditional SPI, LSB first mode dictated auto-incrementing
and MSB first mode dictated auto-decrementing of the
register address.
The first 16 register addresses of devices that adhere to the
unified serial port have a consistent structure.
SPI/I²C PORT SELECTION
Although the AD9542 supports both the SPI and I2C serial port
protocols, only one is active following power-up (as determined
by the M4 multifunction pin during the start-up sequence). The
only way to change the serial port protocol is to reset (or power
cycle) the device. See Table 27 for the I2C address assignments.
SPI SERIAL PORT OPERATION
Pin Descriptions
The serial clock (SCLK) pin serves as the serial shift clock. This
pin is an input. SCLK synchronizes serial control port read and
write operations. The rising edge SCLK registers write data bits,
and the falling edge registers read data bits. The SCLK pin
supports a maximum clock rate of 50 MHz.
The SPI port supports both 3-wire (bidirectional) and 4-wire
(unidirectional) hardware configurations and both MSB first
and LSB first data formats. Both the hardware configuration
and data format features are programmable. The 3-wire mode
uses the serial data input/output (SDIO) pin for transferring
data in both directions. The 4-wire mode uses the SDIO pin
for transferring data to the AD9542, and the SDO pin for
transferring data from the AD9542.
The chip select (CSB) pin is an active low control that gates read
and write operations. Assertion (active low) of the CSB pin
initiates a write or read operation to the AD9542 SPI port. The
user can transfer any number of data bytes in a continuous stream.
The register address is automatically incremented or decremented
based on the setting of the address ascension bit (Register 0x00).
The user must deassert the CSB pin following the last byte
transferred, thereby ending the stream mode. This pin is
internally connected to a 10 kΩ pull-up resistor. When CSB is
high, the SDIO and SDO pins enter a high impedance state.
Implementation Specific Details
The Analog Devices Serial Control Interface Standard provides
a detailed description of the unified SPI protocol and covers
items such as timing, command format, and addressing. The
unified SPI protocol defines the following device specific items:
•
•
•
•
•
•
•
Analog Devices unified SPI protocol revision: 1.0
Chip type: 0x5
Product ID: 0x012
Physical layer: 3-wire and 4-wire supported and 1.5 V,
1.8 V, and 2.5 V operation supported
Optional single-byte instruction mode: not supported
Data link: not used
Control: not used
Communication Cycle—Instruction Plus Data
The unified SPI protocol consists of a two-part communication
cycle. The first part is a 16-bit instruction word coincident with
the first 16 SCLK rising edges. The second part is the payload,
the bits of which are coincident with SCLK rising edges. The
instruction word provides the AD9542 serial control port with
information regarding the payload. The instruction word
includes the R/W bit that indicates the direction of the payload
transfer (that is, a read or write operation). The instruction
word also indicates the starting register address of the first
payload byte.
Write
When the instruction word indicates a write operation, the
payload is written into the serial control port buffer of the
AD9542. Data bits are registered on the rising edge of SCLK.
Generally, it does not matter what data is written to blank
registers; however, it is customary to use 0s. Note that the user
must verify that all reserved registers within a specific range
have a default value of 0x00; however, Analog Devices makes
every effort to avoid having reserved registers with nonzero
default values.
Most of the serial port registers are buffered; therefore, data
written into buffered registers does not take effect immediately.
To transfer buffered serial control port contents to the registers
that actually control the device requires an additional operation,
an IO_UPDATE operation, implemented in one of two ways.
One is to write a Logic 1 to Register 0x0F, Bit 0 (this bit is an
Rev. 0 | Page 55 of 61
�AD9542
Data Sheet
SPI MSB-/LSB-First Transfers
autoclearing bit). The other is to use an external signal via
an appropriately programmed multifunction pin. The user can
change as many register bits as desired before executing an
input/output update. The input/output update operation transfers
the buffer register contents to their active register counterparts.
The AD9542 instruction word and payload can be transferred
MSB first or LSB first. The default for the AD9542 is MSB first.
To invoke LSB first mode, write a Logic 1 to Register 0x00, Bit 6.
Immediately after invoking LSB first mode, subsequent serial
control port operations are LSB first.
Read
Address Ascension
If the instruction word indicates a read operation, the next
N × 8 SCLK cycles clock out the data starting from the address
specified in the instruction word, where N is the number of
data bytes to read. Read data appears on the appropriate data
pin (SDIO or SDO) on the falling edge of SCLK. The user must
latch the read data on the rising edge of SCLK. Note that the
internal SPI control logic does not skip over blank registers
during a readback operation.
If the address ascension bit (Register 0x00, Bit 5) is Logic 0,
serial control port register addressing decrements from the
specified starting address toward Address 0x00. If the address
ascension bit (Register 0x00, Bit 5) is Logic 1, serial control port
register addressing increments from the starting address toward
Address 0x3A3B. Reserved addresses are not skipped during
multibyte input/output operations; therefore, write the default
value to a reserved register and Logic 0s to unmapped registers.
Note that it is more efficient to issue a new write command than
to write the default value to more than two consecutive reserved
(or unmapped) registers.
A readback operation takes data from either the serial control
port buffer registers or the active registers, as determined by
Register 0x01, Bit 5.
SPI Instruction Word (16 Bits)
Table 34. Streaming Mode (No Addresses Skipped)
The MSB of the 16-bit instruction word is R/W, which indicates
whether the ensuing operation is read or write. The next 15 bits
are the register address (A14 to A0), which indicates the starting
register address of the read/write operation (see Table 35). Note
that SPI controller ignores A14, treating it as Logic 0, because
the AD9542 has no register addresses requiring more than a
14-bit address word.
Address Ascension
Increment
Decrement
Stop Sequence
0x0000 … 0x3A3B
0x3A3B … 0x0000
Table 35. Serial Control Port, 16-Bit Instruction Word
MSB
I15
I14
I13
I12
I11
I10
I9
I8
I7
I6
I5
I4
I3
I2
I1
LSB
I0
R/W
A14
A13
A12
A11
A10
A9
A8
A7
A6
A5
A4
A3
A2
A1
A0
CSB
SCLK DON'T CARE
R/W A14 A13 A12 A11 A10 A9 A8 A7
A6 A5
A4 A3 A2
A1 A0
D7 D6 D5 D4 D3
16-BIT INSTRUCTION HEADER
D2 D1 D0 D7
REGISTER (N) DATA
D6 D5
D4 D3 D2
D1 D0
DON'T CARE
REGISTER (N – 1) DATA
15826-006
SDIO DON'T CARE
DON'T CARE
Figure 53. Serial Control Port Write—MSB First, Address Decrement, Two Bytes of Data
CSB
SCLK
DON'T CARE
SDIO
DON'T CARE
DON'T CARE
SDO
D7 D6 D5 D4 D3 D2 D1 D0 D7 D6 D5 D4 D3 D2 D1 D0 D7 D6 D5 D4 D3 D2 D1 D0 D7 D6 D5 D4 D3 D2 D1 D0
16-BIT INSTRUCTION HEADER
REGISTER (N) DATA
REGISTER (N – 1) DATA
REGISTER (N – 2) DATA
REGISTER (N – 3) DATA
DON'T
CARE
Figure 54. Serial Control Port Read—MSB First, Address Decrement, Four Bytes of Data
tDS
tS
tHIGH
tDH
CSB
DON'T CARE
SDIO
DON'T CARE
DON'T CARE
R/W
A14
A13
A12
A11
A10
A9
A8
A7
A6
A5
D4
D3
Figure 55. Timing Diagram for Serial Control Port Write—MSB First
Rev. 0 | Page 56 of 61
D2
D1
D0
DON'T CARE
15826-008
SCLK
tC
tCLK
tLOW
15826-007
A9 A8 A7 A6 A5 A4 A3 A2 A1 A0
�Data Sheet
AD9542
CSB
SCLK
DATA BIT N
15826-009
tDV
SDIO
SDO
DATA BIT N – 1
Figure 56. Timing Diagram for Serial Control Port Register Read—MSB First
CSB
SCLK DON'T CARE
A0 A1 A2 A3
A4
A5 A6 A7 A8 A9 A10 A11 A12 A13 A14 R/W D0 D1 D2 D3 D4
16-BIT INSTRUCTION HEADER
D5 D6 D7 D0
REGISTER (N) DATA
D1 D2
D3 D4 D5
D6
D7
REGISTER (N + 1) DATA
Figure 57. Serial Control Port Write—LSB First, Address Increment, Two Bytes of Data
CS
tC
tS
tCLK
tHIGH
tLOW
tDS
SCLK
BIT N
BIT N + 1
Figure 58. Serial Control Port Timing—Write
Table 36. Serial Control Port Timing
Parameter
tDS
tDH
tCLK
tS
tC
tHIGH
tLOW
tDV
Description
Setup time between data and the rising edge of SCLK
Hold time between data and the rising edge of SCLK
Period of the clock
Setup time between the CSB falling edge and the SCLK rising edge (start of the communication cycle)
Setup time between the SCLK rising edge and CSB rising edge (end of the communication cycle)
Minimum period that SCLK is in a logic high state
Minimum period that SCLK is in a logic low state
SCLK to valid SDIO (see Figure 56)
Rev. 0 | Page 57 of 61
15826-059
tDH
SDIO
DON'T CARE
15826-010
SDIO DON'T CARE
DON'T CARE
�AD9542
Data Sheet
I²C SERIAL PORT OPERATION
The I2C interface is popular because it requires only two pins
and easily supports multiple devices on the same bus. Its main
disadvantage is its maximum programming speed of 400 kbps.
The AD9542 I²C port supports the 400 kHz fast mode as well as
the 100 kHz standard mode.
To support 1.5 V, 1.8 V, and 2.5 V I²C operation, the AD9542
does not strictly adhere to every requirement in the original I²C
specification. In particular, it does not support specifications such
as slew rate limiting and glitch filtering. Therefore, the AD9542
is I²C compatible, but not necessarily fully I²C compliant.
The AD9542 I²C port consists of a serial data line (SDA) and
a serial clock line (SCL). In an I²C bus system, the AD9542
connects to the serial bus (data bus SDA and clock bus SCL)
as a slave device; that is, the AD9542 does not generate an I²C
clock. The AD9542 uses direct 16-bit memory addressing rather
than 8-bit memory addressing, which is more common.
The AD9542 allows up to four unique slave devices to occupy
the I2C bus via a 7-bit slave address transmitted as part of an I2C
packet. Only the device with a matching slave address responds
to subsequent I2C commands. Table 37 lists the supported
device slave addresses.
I2C Bus Characteristics
A summary of the various I2C abbreviations appears in Table 37.
Definition
Start
Repeated start
Stop
Acknowledge
Nonacknowledge
Write
Read
An example of valid data transfer appears in Figure 59. One
clock pulse is required for each data bit transferred. The data on
the SDA line must be stable during the high period of the clock.
The high or low state of the data line can change only when the
clock signal on the SCL line is low.
SDA
CHANGE
OF DATA
ALLOWED
15826-012
SCL
DATA LINE
STABLE;
DATA VALID
The acknowledge bit (A) is the ninth bit attached to any 8-bit
data byte. An acknowledge bit is always generated by the
receiver to inform the transmitter that the byte has been
received. Acknowledgement consists of pulling the SDA line
low during the ninth clock pulse after each 8-bit data byte.
The nonacknowledge bit (A) is the ninth bit attached to any
8-bit data byte. A nonacknowledge bit is always generated by
the receiver to inform the transmitter that the byte has not been
received. Nonacknowledgment consists of leaving the SDA line
high during the ninth clock pulse after each 8-bit data byte.
After issuing a nonacknowledge bit, the AD9542 I²C state
machine goes into an idle state.
Data Transfer Process
The master initiates data transfer by asserting a start condition,
which indicates that a data stream follows. All I²C slave devices
connected to the serial bus respond to the start condition.
The master then sends an 8-bit address byte over the SDA line,
consisting of a 7-bit slave address (MSB first) plus a R/W bit.
This bit determines the direction of the data transfer, that is,
whether data is written to or read from the slave device (Logic 0
indicates write, and Logic 1 indicates read).
The peripheral whose address corresponds to the transmitted
address responds by sending an acknowledge bit. All other
devices on the bus remain idle while the selected device waits
for data to be read from or written to it. If the R/W bit is Logic 0,
the master (transmitter) writes to the slave device (receiver).
If the R/W bit is Logic 1, the master (receiver) reads from the
slave device (transmitter). The format for these commands
appears in the Data Transfer Format section.
Table 37. I2C Bus Abbreviation Definitions
Abbreviation
S
Sr
P
A
A
W
R
generates the stop condition to terminate a data transfer. The
SDA line must always transfer eight bits (one byte). Each byte
must be followed by an acknowledge bit; bytes are sent MSB first.
Figure 59. Valid Bit Transfer
Start and stop functionality appears in Figure 60. The start
condition is a high to low transition on the SDA line while SCL
is high. The master always generates the start condition to
initialize a data transfer. The stop condition is a low to high
transition on the SDA line while SCL is high. The master always
Data is then sent over the serial bus in the format of nine clock
pulses, one data byte (eight bits) from either master (write mode)
or slave (read mode), followed by an acknowledge bit from the
receiving device. The protocol allows a data transfer to consist
of any number of bytes (that is, the payload size is unrestricted).
In write mode, the first two data bytes immediately after the
slave address byte are the internal memory (control registers)
address bytes (the higher address byte first). This addressing
scheme gives a memory address of up to 216 − 1 = 65,535. The
data bytes after these two memory address bytes are register
data written to or read from the control registers. In read mode,
the data bytes following the slave address byte consist of register
data written to or read from the control registers.
When all the data bytes are read or written, stop conditions are
established. In write mode, the master device (transmitter)
asserts a stop condition to end data transfer during the clock
pulse following the acknowledge bit for the last data byte from the
slave device (receiver). In read mode, the master device (receiver)
receives the last data byte from the slave device (transmitter)
but does not pull SDA low during the ninth clock pulse (a
Rev. 0 | Page 58 of 61
�Data Sheet
AD9542
A start condition can be used instead of a stop condition.
Furthermore, a start or stop condition can occur at any time,
and partially transferred bytes are discarded.
nonacknowledge bit). By receiving the nonacknowledge bit, the
slave device knows that the data transfer is finished and enters
idle mode. The master device then takes the data line low
during the low period before the 10th clock pulse, and high
during the 10th clock pulse to assert a stop condition.
SDA
SCL
S
START CONDITION
15826-013
P
STOP CONDITION
Figure 60. Start and Stop Conditions
MSB
ACK FROM
SLAVE RECEIVER
1
SCL
2
3 TO 7
8
ACK FROM
SLAVE RECEIVER
9
1
2
3 TO 7
8
9
S
10
P
15826-014
SDA
Figure 61. Acknowledge Bit
MSB
ACK FROM
SLAVE RECEIVER
1
SCL
2
3 TO 7
8
9
ACK FROM
SLAVE RECEIVER
1
2
3 TO 7
8
9
S
10
P
15826-015
SDA
Figure 62. Data Transfer Process (Master Write Mode, 2-Byte Transfer)
SDA
ACK FROM
MASTER RECEIVER
1
2
3 TO 7
8
9
1
2
3 TO 7
8
S
9
10
P
Figure 63. Data Transfer Process (Master Read Mode, 2-Byte Transfer), First Acknowledge From Slave
Rev. 0 | Page 59 of 61
15826-016
SCL
NONACK FROM
MASTER RECEIVER
�AD9542
Data Sheet
subsequent reads (see Table 39). The receive byte format is used
to read the data byte(s) from RAM starting from the current
address (see Table 40). The read byte format is the combined
format of the send byte and the receive byte (see Table 41).
Data Transfer Format
The write byte format is used to write a register address to the
RAM starting from the specified RAM address (see Table 38).
The send byte format is used to set up the register address for
Table 38. Write Byte Format
S
Slave
address
W
E
A
RAM address high byte
A
RAM address low byte
A
RAM
Data 0
A
A
RAM
Data 1
A
RAM
Data 2
P
Table 39. Send Byte Format
S
Slave address
W
E
A
RAM address high byte
A
RAM Data 0
A
RAM address low byte
A
P
A
P
Table 40. Receive Byte Format
S
Slave address
R
A
RAM Data 1
A
RAM Data 2
E
Table 41. Read Byte Format
S
Slave
address
W
E
A
RAM address
high byte
A
RAM address
low byte
A
Sr
R
Slave
address
A
RAM
Data 0
A
RAM
Data 1
A
RAM
Data 2
A
I²C Serial Port Timing
SDA
tLOW
tF
tR
tSU; DAT
tHD; STA
tF
tSP
tBUF
tR
tHD; STA
S
tHD; DAT
tHIGH
tSU; STO
tSU; STA
Sr
Figure 64. I²C Serial Port Timing
Table 42. I2C Timing Definitions
Parameter
fSCL
tBUF
tHD; STA
tSU; STA
tSU; STO
tHD; DAT
tSU; DAT
tLOW
tHIGH
tR
tF
tSP
Description
Serial clock
Bus free time between stop and start conditions
Repeated hold time start condition
Repeated start condition setup time
Stop condition setup time
Data hold time
Data setup time
SCL clock low period
SCL clock high period
Minimum/maximum receive SCL and SDA rise time
Minimum/maximum receive SCL and SDA fall time
Pulse width of voltage spikes that must be suppressed by the input filter
Rev. 0 | Page 60 of 61
P
S
15826-017
SCL
E
P
�Data Sheet
AD9542
OUTLINE DIMENSIONS
DETAIL A
(JEDEC 95)
7.10
7.00 SQ
6.90
0.30
0.25
0.18
37
36
48
1
0.50
BSC
5.70
5.60 SQ
5.50
EXPOSED
PAD
TOP VIEW
0.80
0.75
0.70
END VIEW
PKG-004452
SEATING
PLANE
0.50
0.40
0.30
24
13
BOTTOM VIEW
0.05 MAX
0.02 NOM
COPLANARITY
0.08
0.203 REF
PIN 1
INDIC ATOR AREA OPTIONS
(SEE DETAIL A)
0.20 MIN
5.50 REF
FOR PROPER CONNECTION OF
THE EXPOSED PAD, REFER TO
THE PIN CONFIGURATION AND
FUNCTION DESCRIPTIONS
SECTION OF THIS DATA SHEET.
COMPLIANT TO JEDEC STANDARDS MO-220-WKKD-4.
02-29-2016-A
PIN 1
INDICATOR
Figure 65. 48-Lead Lead Frame Chip Scale Package [LFCSP]
7 mm × 7 mm Body and 0.75 mm Package Height
(CP-48-13)
Dimensions shown in millimeters
ORDERING GUIDE
Model1
AD9542BCPZ
AD9542BCPZ-REEL7
AD9542/PCBZ
1
Temperature Range
−40°C to +85°C
−40°C to +85°C
Package Description
48-Lead Lead Frame Chip Scale Package [LFCSP)
48-Lead Lead Frame Chip Scale Package [LFCSP]
Evaluation Board
Z = RoHS Compliant Part.
I2C refers to a communications protocol originally developed by Philips Semiconductors (now NXP Semiconductors).
©2017 Analog Devices, Inc. All rights reserved. Trademarks and
registered trademarks are the property of their respective owners.
D15826-0-9/17(0)
Rev. 0 | Page 61 of 61
Package Option
CP-48-13
CP-48-13
�
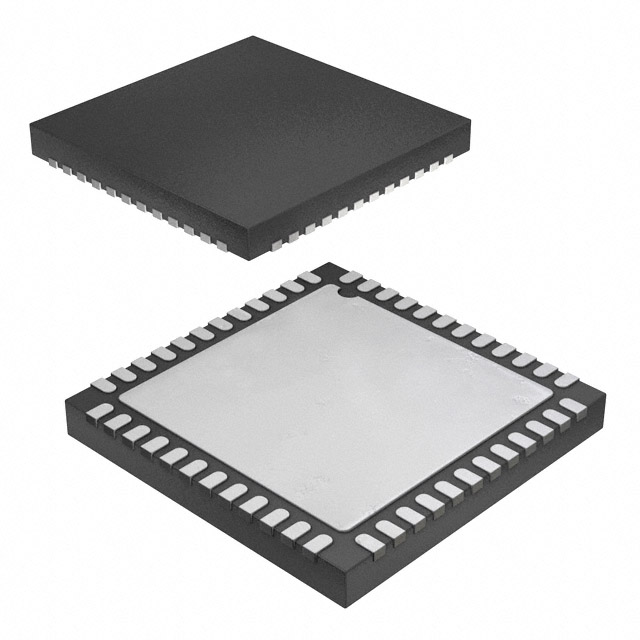


 工商网监
湘ICP备2023018690号
工商网监
湘ICP备2023018690号

