Stache Quick Start.
To download a program from your PC to the Stache…
Start the Parallax Stamp II programming software, and load the program you wish to transfer to the
Stache. You can use either the DOS or the Windows software. If you are running Windows software, be
sure that the proper stamp is targeted (BS2, BS2sx, BS2e or BS2p), and the All option selected for downloads under preferences/editor operation). Connect the Stache to your normal programming cable, using
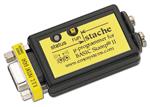
the DB9 gender-changer provided, as shown in the photo. Power the Stache with a good 9-volt battery.
RUN the program just as if you were programming an ordinary BASIC Stamp. The progress bar should
appear on the computer screen, and the LED on the Stache
should flash on and off green as the program is transferred
to the Stache. (If it flashes red, see the error codes below.)
You can now disconnect the programming cable, and you
can disconnect the battery from the Stache. The program
data is stored in non-volatile memory in the Stache.
Special for BS2sx, BS2e & BS2p. These stamps can hold
more than one program in up to 8 program banks. In the
Windows software, the programs can be organized into
projects by use of the $STAMP directive. When you choose RUN, and if ALL is selected under
preferences/editor operation, then all of the programs associated with the project will be downloaded to
the Stache. If you are using the DOS software for the BS2SX, BS2e, or BS2p, you must load and RUN each
program in your project separately, using the ALT-n option to select the target bank before each download. In either case, Windows or DOS, the Stache will store and keep track of all the parts of your project
as one unit.
To upload a program from the Stache to a BASIC Stamp…
When you connect the Stache to a good 9 volt battery, the green light will
flash briefly. Plug the Stache into the programming connector on your
Stamp project or carrier board. Refer to the box if you do not have a standard connector and need to construct an adapter. Be sure the power to your
project is also turned on—the Stache battery does not power your Stamp
project. There must be a
Stache to stamp, program upload adapter
connection (direct or via a
Stache pin 2 of DB9, to pin 1 of the BASIC Stamp
Stache pin 3 of DB9, to pin 2 of the BASIC Stamp
capacitor) from pin 4 of
Stache pin 4 of DB9, to pin 3 of the BASIC Stamp
the DB9 connector to pin
Stache
pin 5 of DB9, to pin 4 of the BASIC Stamp
3 of the BASIC Stamp.
The type of program in the Stache must match the type of Stamp to be programmed, or else you will get an error message.
Press and quickly release the pushbutton on the Stache. The green light
should flash on and off as the program is transferred to the BASIC Stamp,
and then finish up with a longer green flash. (If it flashes red, see the error
codes.) There is no special
action required for the BS2sx, BS2e or BS2p. All of the
error codes (number of red flashes):
programs in the project will be transferred in quick suc1: check connections and power supplies.
cession. That's it! Your Stamp is programmed. Unplug
2: no program for the stamp detected.
the Stache and detach the battery, or move on to pro3: check for loose connections or bad data.
gram other Stamps.
long red: out of stache memory
http://www.emesystems.com
© 2000, 2001, version 1.6, 4-February-2002
page 1 of 10
�Stache User Guide.
New features added with firmware revisions 1.4 to 1.6: Please see page 8.
Definitions:
• download refers to the process of storing Basic Stamp programs into the Stache by commanding
the Parallax editor- to RUN the program. You can use either the DOS (Stamp2.exe) or the Windows
(Stampw.exe) version of the Parallax programming software.
• upload refers to the process of transferring programs from the Stache to a Basic Stamp.
• program refers to a complete BASIC Stamp II program, or to one 2-kbyte bank of a BS2sx, BS2e or
BS2p project. (Note: the BASIC Stamp I is not supported.)
• a project on a BS2sx, BS2e or BS2p consists of up to 8 programs.
Operator Interface: The Stache's has a momentary switch and and a single light emitting diode (LED).
The switch is used only to activate uploads as described below. The LED is used to indicate the status of
various processes and to signal error conditions (see Error Codes). When power is applied, your Stache's
LED glows green for approximately one second. The Stache then assumes a low-power mode awaiting
download or upload processing. If connected to a PC and a download is initiated, the Stache mimics a
Stamp to receive the program from the editor-loader. If connected to a Stamp and the operator activates
the momentary switch, the Stache mimics the editor-loader to upload selected programs to the Stamp.
The Stache automatically recognizes the type of Stamp II to which it is connected and uploads only programs that match that type.
Connection to PC for downloading programs to the Stache: Use the same cable from the PC that you
would use to program a BASIC Stamp. Connect the cable to the Stache using the DB9F gender changer
provided. Power the Stache with a standard 9 volt battery.
Connection for uploading programs from the Stache to the BASIC Stamp: If your BASIC
Stamp system uses a DB9F for its system serial port (as do all of the Parallax carrier boards), then you can
plug the Stache directly into the carrier board, without any adapter or gender changer. On the other hand,
if your BASIC Stamp system has an unusual
Stache to stamp, program upload adapter
connector, you will have to construct an
Stache pin 2 of DB9, to pin 1 of the BASIC Stamp
adapter. Please refer to the box for the conStache pin 3 of DB9, to pin 2 of the BASIC Stamp
nections to the BASIC Stamp II pins. Note
Stache pin 4 of DB9, to pin 3 of the BASIC Stamp
Stache pin 5 of DB9, to pin 4 of the BASIC Stamp (common)
that there must be a connection (either direct
or via a capacitor) from pin 4 of the DB9 connector to pin 3 of the BASIC Stamp. You can provide power to the Stache from a standard 9 volt battery,
or from any power source in the range of 6 to 15 volts DC connected to the battery clips. You should see a
one-second long green flash when you first connect the power. You will not damage the Stache by connecting the battery backwards, however, it will not operate.
The following text shows how to use the Stache with the original BS2, and then moves on to instructions
for the BS2sx , BS2e and BS2p. The Stache can accommodate programs for all types of Stamps at once.
That mixed use will be explained last.
Downloading to the Stache, for the original BS2: Start the Parallax programming software and
load your program. If you are using the Windows software, be sure the file extension is “.BS2” and that
“BS2” is selected as the default stamp mode under Preferences/editor operation. Connect the cable and
power source as described above. RUN the program just as if you were programming an ordinary BASIC
Stamp. The progress bar should appear on the computer screen, and the LED on the Stache should flash
http://www.emesystems.com
© 2000, 2001, version 1.6, 4-February-2002
page 2 of 10
�on and off green as the program is transferred to the Stache memory. (If it flashes red or if the PC gives an
error message, see the error codes on page 6) If your program contains a debug command, a message from
the Stache will appear on the debug screen. The message describes how the memory in the Stache is allocated. This is described in greater detail below. You can now disconnect the programming cable, and you
can disconnect the battery from the Stache. The program data is stored in non-volatile memory in the
Stache.
Upload to the BS2: When you are ready to upload the program to a Stamp, connect the battery and plug
the Stache into the programming connector on your Stamp project or carrier board. We will assume that
you have an appropriate adapter if necessary as described above. Be sure the power to your project too is
turned on—the Stache 9 volt battery does not power your Stamp project. Press and release the pushbutton
on the Stache. The green light should flash on and off as the program is transferred to the BASIC Stamp,
and then finish up with a longer green flash. (If it flashes red, see the error codes.) That’s it! Your Stamp
is programmed.
Operation with multiple BS2 programs: The Stache can store up to 15 BS2 programs. In order to
identify the additional programs, a DATA statement of the following form must appear as the first DATA
statement in your program:
DATA “!n!”
where the n is a number from 0 to 9 or a letter from A to E (upper case only). For example, to create a
program number 1, include the statement,
DATA “!1!”
as the first data statement in the program.
Program #0 is the same as the default program. It is the one that is uploaded with a single quick click on
the pushbutton. You do not have to put the DATA "!0!" statement in the default program.
Note, if you already have data statements in your program, be sure that your program adjusts correctly for
the additional data. The 3-byte ascii string !n! will be burned into the BS2 at location zero, so that other
data will have to move up to location 3. The program can reuse those three bytes at run time if need be.
When you are ready to upload the program #1 to a Stamp, hold down the pushbutton on the Stache for
about three seconds, and you will see the LED blink green. During or just after that first blink, release the
button and the Stache will immediately upload program #1 to the target Stamp. Similarly, if you have a
program #2, release the pushbutton on the Stache after you see the second blink of the green LED. And so
on, for programs up to number E (=14 blinks of the LED). The Stache will only attempt to upload programs for which you have assigned a number. For example, if you release the pushbutton after 4 blinks,
and there exists no program #4 for the BS2 in the Stache memory, then two red blinks will be emitted
("No program for the stamp detected").
To erase a numbered program, create a program with only the statement
DATA “!n!”
where n is 0 to 9 or A to E. The BS2 program with that number will be erased from the Stache.
Downloading to the Stache, for the BS2sx, BS2e or BS2p: A BS2sx, BS2e or BS2p project may
include up to 8 programs, loaded into 8 individual banks of memory in the Stamp. Each of these programs can be up to 2k bytes of program code, and each is equivalent to one program in the original BS2.
When downloaded to a Stache, each of those programs occupies one program slot. You program the
Stache just as if you were programming a BS2sx, BS2e or BS2p directly. Please refer to the Parallax documentation. The Stache automatically keeps track of projects and program bank assignments. The procedure differs depending on whether you are using the DOS software or the Windows software.
http://www.emesystems.com
© 2000, 2001, version 1.6, 4-February-2002
page 3 of 10
�Using the DOS software: (STAMP2SX.EXE or STAMP2E.EXE or STAMP2P.EXE): Start the programming software and load the program you wish to download to the Stache. The program extensions should
be .bsx, .bse or .bsp. This will be the first of up to eight programs you may upload as part of this one project. It doesn’t matter what order you send them. If this program is supposed to go into bank zero, then
press ALT-0 to target it to bank zero. Or ALT-1 for bank 1 and so on. The DOS software requires that you
select the target bank for each program manually. With the cable and power source connected as
described above, RUN the program just as if you were programming an ordinary BASIC Stamp. The progress bar should appear on the computer screen, and the LED on the Stache should flash on and off green
as the program is transferred to the Stache memory. (If it flashes red or if the PC gives an error message,
see the error codes on page 6) A message from the Stache may appear on the debug screen (see page 6).
Subsequently you can load the next program in this project into the Stamp programming environment,
and again press ALT-n to target it to the correct bank n. Again RUN the program and observe the progress bar and the green LED. Continue this process until you have downloaded all of the programs in this
project to the Stache. This is just like programming a BS2sx, BS2e or BS2p. You can now disconnect the
programming cable, and you can disconnect the battery from the Stache. The project data is stored in
non-volatile memory in the Stache. Once all of these separate programs that comprise one project are
downloaded into the Stache, they become a unit, and subsequently they will all be uploaded as a unit to a
BASIC Stamp.
Using the Windows software: (STAMPW.EXE — you should use version 1.1 or later): Start
the programming software and load the project you wish to download to the Stache. Be sure the file extension is .bsx, .bse or .bsp, as appropriate. Also be sure that the download mode is set to All, at least until
you understand exactly how it works. The Windows software allows up to 8 programs to be linked together into one project. Please refer to the software documentation to see how it is done, using the $STAMP
directive. With the cable and power source connected as described above, RUN the project just as if you
were programming an ordinary BASIC Stamp 2sx, 2e or 2p. The progress bar should appear on the computer screen, and the LED on the Stache should flash on and off green as the program(s) are transferred
to the Stache memory. All of the programs associated with the project will be downloaded to the Stache in
quick succession. The Stache will store and keep track of all the parts of your project as one unit. . (If the
l.e.d. flashes red or if the PC gives an error message, see the error code s on ppage 6) A message from the
Stache may appear on the debug screen (page 6). You can now disconnect the programming cable, and
you can disconnect the battery from the Stache. The project data is stored in non-volatile memory in the
Stache.
Upload to the Stamp 2sx, 2e or 2p: When you are ready to upload the project, connect the power
source and plug the Stache into the programming connector on your Stamp project carrier board. We will
assume that you have an appropriate adapter if necessary, as described on page 2. Be sure the power to
your project is also turned on—the Stache 9 volt battery does not power your Stamp project. Press and
release the pushbutton on the Stache. The green light should flash on and off as the program is transferred to the BASIC Stamp, and it should continue to flash for each program bank in the project, and then
finish up with a longer green flash. (If it flashes red, see the error codes on page 6) Note that the Stache
automatically uploads all of the programs associated with the project.
Operation with multiple BS2sx, BS2e or BS2p projects: The Stache can store up to a total of 15
program banks. In order for the Stache to identify additional programs as parts of distinct projects, a
DATA statement of the following form must appear as the first DATA statement in each program associated with a project :
DATA “!n!”
where the n is a number from 0 to 9 or a letter from A to E (upper case only). For example, to create a
project number 1, include the statement,
http://www.emesystems.com
© 2000, 2001, version 1.6, 4-February-2002
page 4 of 10
�DATA “!1!”
as the first data statement in each program associated with project number 1.
Project #0 is the same as the default project. It is the one that is uploaded with a single quick click on the
pushbutton. It is not necessary to put the DATA “!0!” statement in the default programs.
Note that if you already have data statements in your program, be sure that your program adjusts correctly for the additional data. The ascii string !1! will be burned into the BS2 at location zero, so that other
data will have to move up to location 3. The program can reuse those three bytes at run time if need be.
When you are ready to upload that project from the Stache to a Stamp, hold down the pushbutton on the
Stache for about three seconds, and you will see the LED blink green. During or just after the first blink,
release the button, and the Stache will upload project #1 to the target Stamp. That includes all the programs associated with project #1. Similarly, if you have a project #2, release the pushbutton on the Stache
after you see the second blink of the LED. And so on. The Stache will only attempt to upload projects for
which you have assigned a number. For example, if you release the pushbutton after 4 blinks, and there
exists no project #4 for the connected Stamp in the Stache memory, then two red blinks will be emitted
(No program for the stamp detected).
To erase a numbered project: Create BS2sx, BS2e or BS2p program consisting of only the statement,
DATA “!n!”
where n is 0 to 9 or A to E. The project with that number will be erased from the Stache memory. Be sure
to target the program for the correct type of stamp (BS2, BS2sx, BS2e or BS2p). All programs associated
with that project will be erased.
Operation with multiple projects, mixed types: Your Stache can hold as many as 15 programs.
That could be 15 BS2 programs. Or it could be two BS2sx projects (one 8-program and one 7-program
project). A Stache may simultaneously contain BS2, BS2sx, BS2e and BS2p projects, in any desired project mix. For instance, the following Stache contents are all valid:
• One BS2 project (=program)
• Seven BS2 projects (=programs), plus one BS2sx project with eight programs
• Four BS2 programs; and one project each for a BS2sx, a BS2e and a BS2p, each consisting of 3 programs.
• Fifteen BS2sx projects each with one program
Project numbers from 0 through 9 and A through E are recognized by the Stache. Other directives will
cause the red led to emit 4 flashes (“out of range project directive”). BS2, BS2sx,, BS2e and BS2p projects
are distinct and may have the same project identifier. For example, a Stache can hold distinct projects #0
for a BS2, a BS2sx, a BS2e and a BS2p. When the pushbutton is activated briefly, the Stache will upload
the whichever project #0 is appropriate for the currently connected Stamp.
Be careful, especially when using the Windows software, that you are targeting the program to the appropriate Stamp. The most important safeguard is to save the file, appending the appropriate file extension
.bs2, .bsx, .bse or .bsp. The selection of Stamp mode under preferences/editor operation applies only to
programs that have not yet been saved with one of the special Stamp extensions, and to the IDENTIFY
option (CTRL-I). The highest priority is given to the $STAMP directive, and it overrides both the file
extension and the preferences setting. The lastest version of the IDE enforces the use of the $Stamp
directive.
When a program is RUN from the editor (downloaded to the Stache) it will replace any previously downloaded program that meets all three of the following criteria:
(1) The program is targeted at the same type of Stamp (2, 2sx, 2e or 2p) as the one in the Stache.
http://www.emesystems.com
© 2000, 2001, version 1.6, 4-February-2002
page 5 of 10
�(2) The program has the same project number as the one in the Stache. (e.g., DATA "!1!")
(3) The program number is the same as the one in the Stache (e.g., program #0 in project #1).
This allows you to create overlays. Here is an example: Let us say you have a BS2sx project that occupies
7 program banks. In the field you must be prepared to install 3 different versions of that program that
differ only in program banks 0 and 1. You can create a project that contains all 7 banks, and you can also
create 3 other projects, numbered !1!, !2! and !3!, that contain the three versions of only banks 0 and 1.
Out in the field, you can choose the whole install, or you can overlay the specific version you need for the
location. Banks 0 and 1 will be uploaded without disturbing the contents of banks 2 to 6.
Initialize the Stache:
To erase ALL the programs stored in your Stache, download a program of any type containing the statement
DATA "*.*"
alone. The LED will flash alternating green and red to indicate all 15 program storage areas are logically
erased and ready for re-use. This erases
error codes (number of red flashes):
ALL programs; there is no retreat!
1: check connections and power supplies
Error Codes:
The LED will slowly flash red the indicated number of times to indicate the error
number, then resume the low-power
mode.
Check cable connections to pins 2, 3, 4 and 5 of the DB9
connector; or power to stamp or to the Stache.
2: no program for the stamp detected.
There is no project in the Stache that matches both the
selected number and the type of Stamp detected.
3: check for loose connections or bad data
Data checksum were bad due to a loose connection or
or an unexpected error. Try again.
4: out of range project directive
Debug message:
Only 0 to 9, A to E are allowed.
To help you keep track of its current
long red: out of stache memory
state, the Stache sends a message out
Only 14 programs allowed. Erase one or more)
through the serial port at the end of a
download from the PC. If the program
downloaded contains a DEBUG statement, then a debug screen will open. It will display a message of the
form shown in the box. In the exampleshown, there are three BS2 programs designated as #0, #1 and #2,
and two BS2sx projects, the first designated #0 with program banks 0 to 4, and the second project #1
with program banks 0 and 1. There are also one proj***_STACHE Storage Status_***
ect each for the BS2e and the BS2p, each of which
BS2: 0 1 2
occupies two program slots. There is room for one
2SX: 0.01234 1.01
more program in this Stache.
2e: 2.01
2P:0.01
14 of 15 STACHE banks used
** (c)2000 emesystems.com **
* firmware v1.4 by S.Parkis *
EME Systems
2229 Fifth St., Berkeley CA 94710
tel:510/848-5725 fax:510/848-5748
http://www.emesystems.com
http://www.emesystems.com
BASIC Stamp ® is a registered trademark of Parallax, Inc.
Parallax Inc., 599 Menlo Drve, Suite 100, Rocklin CA 95765
tel:888/512-1024 or 916/624-8333 fax:916/624-8333
http://www.parallaxinc.com
© 2000, 2001, version 1.6, 4-February-2002
page 6 of 10
�Stache, technical Information and circuit description:
The Stache is built around a Scenix SX18AC microcontroller run at 4mhz in the turbo mode. The pushbutton is connected to pin ra.3 with a pullup resistor to Vdd. Pushing the button brings ra.3 low. A capacitor debounces the switch. A second capacitor couples the pushbutton into the reset circuit, so that processor reset occurs when the pushbutton is
pressed. The processor may also be awakened from the sleep state by activity on the attention pin, rb.0. An led is connected between pin rb.6 and rb.7. to signal the operational status of the Stache to the user. This is a bicolor led with red
and green in the same package. Green indicates successful operations, and red signals error codes.
Application data is stored in a 32kbyte 24LC256 I2C memory chip. It has two control lines, SDA (serial data) and SCL
(serial clock), with pullup resistors as required by the I2C protocol. The memory is organized by the program into 15
banks of data, 2kbytes each, to store BASIC Stamp program data, and one 2k bank reserved for an allocation table.
RS232 serial data is received directly on the SX18 input pins, via 22kΩ resistor for protection, while data for transmission
is actively asserted high via the transistors Q1, Q2 and Q3. The DB-9 can function as either DCE or DTE. The operation as
DCE or as DTE is determined by the conditions that prevail on the pushbutton (ra.3) and on the ATN (rb.0) and TX (rb.2)
pins at reset.Pins rb.0, rb.2 and rb.4 are always inputs from the DB9, and rb.1, rb.3 and rb.5 are always outputs to drive the
PNP transistors Q1, Q2 and Q3. When a transistor is off, the signal from the DB-9 passes through directly to the input
pin. When the transistor is on, it drives its output line to a high level. The signal lines have pulldown resistors that pull low
when the transistor is off, or they may be pulled below ground by the rx line (through the 3kΩ resistor) when receiving a
program from a PC. When downloading data into the Stache, the DCE connections on the DB9 are: pin 2) rx output from
rb.5, via Q1; pin )3 tx input to rb.2, pin 4) atn input to rb.0. When uploading data from the Stache to a Stamp, the DTE
connections on the DB9 are: pin 2) rx input to rb.4, pin 3) tx output from rb.3 via Q2, pin 4) atn output from rb.1 via Q3.
The pushbutton coupled with feedback from the l.e.d. allow the user to select advanced features. The simplest operation is the single press of the button, which will send the “default” program from the Stache to the target BS2, BS2sx, BS2e
or BS2p. Holding the pushbutton down for a longer interval starts the l.e.d. flashing at one second intervals, to allow the
user to select alternate programs for upload. Pin ra.2 is unused.
Power is supplied from an external 9 volt battery. Optionally, for OEMs, power can be supplied from from pin 9 of the
RS232 connector, if the diode shown shaded is soldered into place. The active current is 8–20 milliamps . Sleep current is
50 microamps.
The Stache is a joint effort of Tracy Allen at EME Systems (hardware/production)and Steve Parkis (firmware).
http://www.emesystems.com
© 2000, 2001, version 1.6, 4-February-2002
page 7 of 10
�Revision History of the Stache firmware.
The current version of the Stache firmware is 1.6
Please visit
for information about updates. The version number of the
Stache firmware appears in the debug window, right after you program a Stamp with a program that has at
least one debug command. You can also find the version numbers (1.4 and above) on a label on the Stache.
If you have purchased a Stache with an older version of the firmware, you can send it back to us for an
upgrade. Please send email in advance. The upgrade is free for Stache purchased after 11/1/2001. For
earler purchases, the cost is $6 with return shipping in the U.S.A. via UPS ground or first class mail, or
$10 via UPS blue label expeditied shipping. If you are outside the United States, please email for instructions. A participating Parallax reseller may be able to handle the upgrade.
Version 1.6.
This upgrade makes the Stache firmware compatible with the version 1.3 IDE, STAMPW.EXE
released by Parallax in November, 2001. The version 1.6 firmware is completely rewritten to use the
interrupts, so that it should be able to handle any additional changes Parallax introduces in the protocols or timing. Our v1.6 firmware is also completely compatible with the "Object Code Loader" for
field programming.
Version 1.5.
This is a maintenance upgrade, to make the Stache firmware compatible with the version 1.2 IDE,
STAMPW.EXE released by Parallax in September, 2001. The IDE now tests all available com ports
and identifies any stamps attached to each of those ports. The rapid-fire identification process caused
problems for the old Stache firmware. Version 1.5 resolves those problems. If you do not want to
upgrade your Stache firmware, you can continue to use the Parallax version 1.1 STAMPW.EXE to program the Stache.
Version 1.4.
• Version 1.4 is the first public release since version 1.0.
• Support added for the BS2P The new BS2P chip in the 24 and 40 pin packages requires special programming codes. The old version of the Stache cannot program this chip.
• V.1.4 implements faster transfer of programs to the Stamp, allocated blocks only. The old version
transmitted each program to the target stamp as one block of 2k bytes, and filled bytes unused by
the program with zeros. This process takes longer than necessary for a short program. Also, it overwrites some data in the stamp that some specialized industrial users might want to keep.
• The version 1.4 firmware works like the Stamp software, and transfers to the target Stamp only those
program blocks that contain program or defined data. Each block is a unit of 16 bytes. Short programs are transferred very quickly, because it is no longer necessary to transfer all 2k bytes. Also,
specialized users can transfer only certain desired blocks of data and leave other blocks in the target
stamp untouched.
• A "BSAVE" feature that allows you to capture program tokens as a text file. The Stache can be
induced to dump its contents as an ASCII text file that can be captured by any terminal program,
such as hyperterminal. The hex codes in this file are the same as the ones seen in the memory map
window in the stamp editor, with added headers to associate the data with programs within projects.
This data can be used for debugging and for special programming options.
http://www.emesystems.com
© 2000, 2001, version 1.6, 4-February-2002
page 8 of 10
�Troubleshooting notes:
EME Systems stands by its products. If you have any difficulty using the Stache, please call us so
that we can help you resolve the problem.
phone (510) 848-5725 fax:(510)848-5748 email: stache@emesys.com
1) Long Cables: We have had a couple of reports that the Stache will not upload programs to a
Stamp over a long cable, even though it will do so when connected directly. First, check your cable.
Remember that the reset pin (pin 4 on the DB9) must be connected, and the cable from the Stache
to the Stamp must be “straight through” as shown in the diagrams in the Stache documentation. It
is true that the Stache/Stamp connection will not be able to drive very long cables. Both the Stamp
and the Stache use a pirate power scheme that relies on a pulldown resistor to bring the serial line
to its low level. This response can be too slow on a long cable. We do not have an exact figure for
how long is too long. We have had no trouble using a 4 foot long cable to our OWL data loggers. If
you do need to use a long cable, it may help to install an additional resistor of ~1k ohms from pins
3 to ground (pin 5), on the DB9 connector by the Stache.
2) Stache does not accept a new program: A few early Staches exhibited a problem, wherein
they refuse to accept a new program from the PC. This problem occurs when you detach the battery from the Stache for a while, and then reattach it and attempt to download a new program. As
a fix, depress the reset button for a few seconds before you reattach the battery. If you discover
that you have such a Stache, please return it to EME Systems for a free fix. Revision 1.4 Stache
resolves this problem.
3) Stache does not work with version 1.2 or 1.3 of STAMPW.EXE. These require that
you have version 1.6 of the Stache firmware, due to changes in the way that they support multiple
kinds of stamps. The version number of your stamp firmware should be found on a label on the
Stache. If you cannot upgrade the firmware by returning the Stache to EME Systems or to a participating Parallax reseller, you can still program the Stache using the version 1.1 STAMPW.EXE or
the DOS programming tools.
4) Question. I had a 3-bank project and now I loaded in a 1-bank project, but the Stache tells me I
still have 3 banks. What gives? The Stache allows overlays, and thinks that you are simply changing one bank of that old project. The Stache will transfer all of those banks to your target Stamp.
To start over from scratch, you must erase that project completely from the Stache.
EME Systems
2229 Fifth St., Berkeley CA 94710
tel:510/848-5725 fax:510/848-5748
http://www.emesystems.com
http://www.emesystems.com
BASIC Stamp ® is a registered trademark of Parallax, Inc.
Parallax Inc., 599 Menlo Drve, Suite 100, Rocklin CA 95765
tel:888/512-1024 or 916/624-8333 fax:916/624-8333
http://www.parallaxinc.com
© 2000, 2001, version 1.6, 4-February-2002
page 9 of 10
�Above: The diagram shows how you might use a
Stache to program a stamp project out in the field, or
how you might physically send a Stache to someone to
do the field programming if you cannot go yourself.
Below: The new Parallax "object loader" allows you
to send a program in condensed form to your customer
by email, and they can then easily load it into a Stache
and take it to do the actual update at the field site.
http://www.emesystems.com
© 2000, 2001, version 1.6, 4-February-2002
page 10 of 10
�


 工商网监
湘ICP备2023018690号
工商网监
湘ICP备2023018690号
