Relay Shield
The Relay Shield allows you to take over the world, one electric appliance at a time. Want to control
a lamp, fan, coffee machine, aquarium pumps or garden sprinklers? Then this is a solution for you!
The shield comes with four relays that are rated at a max of 220V @10Amp allowing you to control
any electric appliance rated at under 2000 Watts. You are not just limited to an appliance though;
any gadget that requires high voltage and/or a lot of current can be controlled with this shield.
We have even provided a small prototyping area around the shield for you to add more components
or connectors. A temperature sensor to go along with your brewer, maybe?
IMPORTANT: This shield provides regulated power (5V) to the seated Particle device and relays.
However, it does not support power to the devices controlled by the relays.
Relay Shield - Library
If you're already logged into Build.particle.io then you can jump directly to the library to get going
quickly and easily with the RelayShield library, which wraps all the features in easy-to-use functions.
Examples include:
1. Blink a Relay - How to turn a relay on and off
2. Blink all the Relays - An extension on the simplest case
3. Internet Relays - Creating Particle.function()s so that you can turn relays on and off over the
Internet
�Relay Shield - Operation
The schematic for the relay shield is simple and self explanatory. The shield has four relays that are
controlled by pins D3, D4, D5 and D6 on the Particle device. Each relay is triggered via a NPN
transistor that takes a control signal from the Particle device and switches the relay coil ON and
OFF, which in turn makes or breaks the electrical contact on the output. There is also a fly-back
diode connected across the coil to help protect the transistor from high voltage transients caused
during switching.
NOTE: On the under side of the relay shield (top center), you will see 4 solder pads that are by
default bridged via traces. You can scratch off the trace to disconnect the control pin from the
preassigned ones (D3 to D6) and wire up based on your project requirement.
Relay Shield Schematic – Control
�The relays are SPDT (Single Pole Double Throw) type, which means they have three terminals at
the output: COMMON (COMM), Normally Open (NO) and Normally Closed (NC). We can either
connect the load in between the COMM and NO or COMM and NC terminals. When connected in
between COMM and NO, the output remains open/disconnected when the relay is turned OFF and
closes/connects when the relay is turned ON. In the later case, the output remains closed/connected
when the relay is OFF and opens/disconnects when the relay is ON.
Relay Shield Schematic - Power Supply
The Relay Shield uses a high efficiency RT8259 switch mode voltage regulator that provides a
constant 5V to the Particle device and the relays. The regulator is rated at 1.2A max output current
which is ample enough to power the Particle device, the four relays and still have left over for other
things you may decided to connect later. You can power the shield via the 5.5mm barrel jack or
through the screw terminal. There is a reverse polarity protection diode in place so that you don't fry
the electronics by plugging in the wires in reverse!
Here is an example setup to control a light bulb. The relay acts like a switch which is normally open
and when pin D3 on the Particle device is turned HIGH, it activates Relay 1 thereby closing the
circuit on the light bulb and turning it ON. Ta dah!
�Relay Shield - Sample Setup
Relay Shield - Sample Code
int RELAY1 = D3;
int RELAY2 = D4;
int RELAY3 = D5;
int RELAY4 = D6;
void setup()
{
//Initilize the relay control pins as output
pinMode(RELAY1, OUTPUT);
pinMode(RELAY2, OUTPUT);
pinMode(RELAY3, OUTPUT);
pinMode(RELAY4, OUTPUT);
// Initialize all relays to an OFF state
digitalWrite(RELAY1, LOW);
digitalWrite(RELAY2, LOW);
digitalWrite(RELAY3, LOW);
digitalWrite(RELAY4, LOW);
//register the Particle function
Particle.function("relay", relayControl);
}
void loop()
{
// This loops for ever
}
// command format r1,HIGH
�int relayControl(String command)
{
int relayState = 0;
// parse the relay number
int relayNumber = command.charAt(1) ‐ '0';
// do a sanity check
if (relayNumber 4) return ‐1;
// find out the state of the relay
if (command.substring(3,7) == "HIGH") relayState = 1;
else if (command.substring(3,6) == "LOW") relayState = 0;
else return ‐1;
// write to the appropriate relay
digitalWrite(relayNumber+2, relayState);
return 1;
}
An example API request to this function would look something like this:
POST /v1/devices/{DEVICE_ID}/relay
# EXAMPLE REQUEST
curl https://api.particle.io/v1/devices/0123456789abcdef/relay \
‐d access_token=123412341234 ‐d params=r1,HIGH
Relay Shield - Specifications (v3.x.x)
Operating voltage: 7 to 20V DC
Current consumption: 150mA min to 290mA max (at 9V DC)
Relay Max Voltage: 220V AC
Relay Max Current: 10Amp at 125V AC
Relay Part Number: JS1-5V-F
Dimensions: 6.0" x 1.7"
Weight: 80 gms
Drill Template > https://docs.particle.io/assets/images/shields/relay-shield/relay-shield-template.pdf
https://docs.particle.io/datasheets/particle‐shields/#relay‐shield 10‐19‐17
�
很抱歉,暂时无法提供与“RLYSHIELD”相匹配的价格&库存,您可以联系我们找货
免费人工找货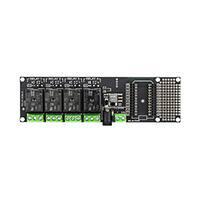


 工商网监
湘ICP备2023018690号
工商网监
湘ICP备2023018690号
